
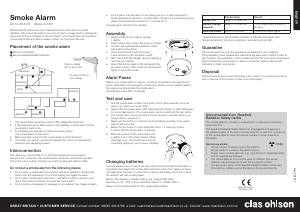
Avoid placement near kitchens or garages, where combustion
particles from cooking or exhaust fumes may trigger an alarm.
Also avoid placement in damp or humid areas, such as unnished
attics. Do note place close to ceiling fans or fresh air vents as
draughts can blow smoke away from the alarm.
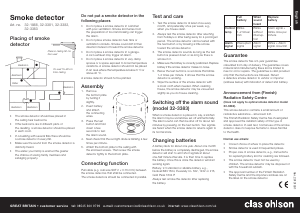
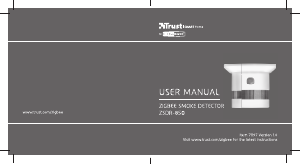
3. INSTALLATION/MOUNTING
Now t the mounting plate to the ceiling or wall using the screws
provided. Your smoke alarm will activate automatically whilst you
twist your smoke alarm into place.
Red LED is lit under the test button for a brief moment shortly after. If LED signal is obtained,
all functions are accurately tested and your smoke alarm is ready to protect. To remove your
smoke alarm for maintenance or when it is time to replace the unit, remove it from the mount-
ing plate by twisting it slightly counter-clockwise. Your smoke alarm will deactivate automati-
cally when removed for mounting bracket.
Note! Your smoke alarm will not operate without power supply, make sure to mount your
smoke alarm properly on the mounting bracket! Now test operation by pressing the test button
(please refer to the “TESTING & MAINTENANCE” section).
4. TESTING & MAINTENANCE
The LED will ash once every 10 seconds, indicating proper
operation. Every unit can be tested individually by pressing the
test button. The unit will emit a loud alarm, and all functions
are accurately tested.
Test the smoke alarm at least once every month, preferably once
every week, e.g. when you house clean. Always test the smoke
alarm after returning from holidays or after being away for a
longer period of time. The smoke alarm sounds as long as the test
button is pressed down or as long as there is smoke in the chamber.
WARNING: Do not test with ames, this may cause damage to the smoke alarm or result in
injury or death. We do not recommend test with smoke, this could be misleading unless proper
test equipment is used. The test button accurately tests all functions of the smoke alarm.
Vacuum your smoke alarm regularly with the soft brush attachment and wipe the unit with a
slightly damp cloth.
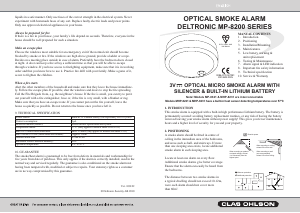
5. MAIN FEATURES
Alarm memory
A unit triggered by smoke has an alarm memory, indicated with a double blink; as well as a
short beep every 10 seconds during 12 hours. This signal can be manually silenced by pressing
the test button.
Silencer / Pause function (sensitivity reduction)
If there is a risk of nuisance alarms (before an alarm has occurred) push the test/silencer button
briey and the sensitivity will be reduced temporarily for 15 minutes (it will automatically
re-set to normal sensitivity after this period). This is indicated with two short fast beeps, and
the LED will blink every 3 seconds. The smoke alarm could also be re-set manually by a short
push of the test/silencer button, and the sensitivity immediately returns to normal (indicated
with 3 short beeps). Silence any nuisance alarms by pushing the test/silencer button after the
alarm has started. Note! If the smoke concentration is very high, the smoke alarm can only be
silenced by deactivating (dismounting) the unit.
Interconnection features (only applies to models MP/MHP-8231)
For larger dwellings several smoke alarms can be interconnected ensuring the earliest warn-
ing of re. When one alarm detects smoke, it will trigger all others to sound, giving your
family more time to escape. Connect provided cable connector to connection pin located in
the back of the smoke alarm and pull cable (e.g. EKU bell wire 2 x 0.7 mm²) between the
smoke alarms that are to be connected. The smoke alarms should be connected in paral-
lel. Follow the colour coding. Connect e.g. black to black and red to red. The smoke alarm
system can not be interconnected to other electrical installations.
6. LOW BATTERY WARNING & UNIT REPLACEMENT
This smoke alarm has a built-in non-replaceable Lithium battery with a life expectancy of over
10 years. Approximately 1 month before the battery is completely discharged, the smoke alarm
will start to emit short signals at about one-half minute intervals. It is then time to replace
the smoke alarm. The alarm works as normal during this time. Waste electrical products should
not be disposed of with household waste. Please recycle where facilities exist.
7. ALARM SIGNAL & LED INDICATION
Signal: Message: Action:
1 long beep every minute Low battery voltage Replace smoke alarm ASAP
1 short beep every 10 seconds Alarm memory, triggered alarm
(12 hours duration)
Reset by pressing test button
2 short beeps (after pressing
the test button)
Silencer activated. Operation OK - reduced sensitivity
3 short beeps (after pressing
the test button)
Silencer deactivated.
(Normal operation)
Operation OK - normal sensitivity
3 short beeps (repeated) Technical problem / operation fault Clean unit by vacuuming with the soft
brush attachment / return unit for servicing
Continuous pulsating signal Smoke detected - Alarm! Please refer to “If a re starts”
8. IMPORTANT FIRE SAFETY INFORMATION
This could be done to avoid re
Always keep matches out of children’s reach. Never leave lighted candles unattended. Never
empty ashtrays into a wastepaper basket or rubbish bag without rst seeing that everything
isproperly extinguished. Pour water into the ashtray before you empty it – or let it stand over-
night.
Before you go to bed, make sure that the re in the replace is properly extinguished
or that the rescreen is in place so that no sparks can y out. Handle and store inammable


Bli med i samtalen om dette produktet
Her kan du dele hva du synes om Clas Ohlson MP-8221 Røykvarsler. Hvis du har et spørsmål, les først bruksanvisningen nøye. Be om en bruksanvisning kan gjøres ved å bruke vårt kontaktskjema.