
SVENSKA MAGYARSUOMI ČESKYNORSK POLSKIΕΛΛΗΝΙΚΑ TÜRKÇE
TRIMMER FÖR NÄSA/ÖRON/ÖGONBRYN
Läs säkerhetsanvisningarna noggrant innan du använder
apparaten.
Med denna trimmer från BaByliss tar du snabbt och
säkert bort oönskat eller störande hår i ögonbryn, näsa
och öron.
EGENSKAPER
• Löstagbart cirkelformat klipphuvud särskilt för öron och
näsa.
• Löstagbart precisionshuvud särskilt för ögonbrynen.
• Distanskam som ger ögonbrynen 2 längder: 3 och 5 mm.
SÄTTA IGÅNG APPARATEN
1. När du vill sätta i ett batteri skruvar du av apparatens
nedre del (bild 1).
2. Sätt i ett alkaliskt AA-batteri med pluspolen nedåt. (Ta
batteriet ur apparaten om du inte använder den på
länge eller om batteriet är tomt. Detta bidrar också till
att förlänga deras hållbarhet.)
3. När du har satt i batteriet placerar du pilen i linje med
skåran på batterilocket och vrider till höger tills den är
i linje med cirkeln (bild 2).
4. Starta apparaten genom att vrida batterihöljet till
höger. Apparaten startar när ”I”-markeringen är i linje
med skåran på batterihöljet (bild 2).
5. Stäng av apparaten när du är klar genom att vrida
skåran på batterihöljet i linje med cirkeln (bild 2).
Sätta på och ta bort klipphuvudena
Se noga till att apparaten är avstängd.
- Ta bort klipphuvudet från apparaten genom att vrida
det tills markeringen (I) är i linje med
IMPORTANT SAFETY
INSTRUCTIONS
READ ALL INSTRUCTIONS
BEFORE USING
FOR HOUSEHOLD
USE ONLY
KEEP AWAY FROM WATER
WARNING
1. Use close supervision when the appliance is
used by, on, or near children or individuals with
certain disabilities.
2. Use appliance only for its intended use as
described in this manual. Use only attachments
recommended by the manufacturer.
3. Never operate the appliance if it is not work-
ing properly, or has been dropped or damaged.
If appliance has fallen into water, do not
reach for it. Drain the water, let the unit dry, be
sure unit is off and then replace the battery.
4. Do not use the appliance with teeth missing
from the blades, as injury may result. Before
each use, make certain the blades are aligned
properly and oiled.
SAVE THESE
INSTRUCTIONS
TROUBLESHOOTING
There are several things to look for if your
trimmer fails to operate:
1. Be sure the trimmer is turned on.
2. Make sure that the battery is properly placed
in the battery compartment. Test the battery to
be sure it is working.
3. Check the blades to see if they are clogged
with hair clippings; if so, use a cleaning brush
to remove hair.
OPERATING
INSTRUCTIONS
1. To insert battery, remove compartment cover
by turning bottom piece of trimmer to the left,
then pulling straight down (Fig. 1).
2. Insert a AA battery, positive terminal
downward. (If you are not going to use the
device for long periods of time or if the battery
is dead, remove the battery from the device.
This will increase the battery's life.)
3. After inserting the battery, align the arrow
with the notch on battery cover and turn to the
right to align with the circle (Fig. 2).
*Do not use in the shower. To clean, simply
rinse trimmer blade under faucet.
4. Always purchase the correct size and grade
of battery most suitable for the intended use.
5. Clean the battery contacts and also those of
the device prior to battery installation.
6. Ensure the battery is installed correctly with
regard to polarity (+ and -).
7. Store unused batteries in their original
packaging, away from metal objects that could
short-circuit them. Never short-circuit batteries.
8. Never dispose of battery in fire, except under
conditions of controlled incineration. Failure
to observe this precaution may result in an
explosion. Never attempt to recharge primary
battery, as this may cause leakage, fire,
or explosion.
9. This appliance is not a toy. Keep away
from children.
GETTING STARTED
NOSE/EAR HAIR TRIMMER
Using the special circular cutting head for nose
and ears, gently insert the cutting head into the
nostril or ear and move it slightly back and forth
to cut the hair.
NOTE: To trim nose hair, insert trimmer at entry
of nostrils and start trimming the lower hairs
until no longer visible.
To trim ear hair, guide the trimmer around the
outer surface of the ear.
TO SWITCH TRIMMER HEADS
Check that the device is turned off.
• Remove the trimming head of the device by
turning it to line-up mark (
) with mark ( ).
Next, pull the head of the device upward (Fig. 3).
• Gently place the desired cutting head on the
device, then lock by turning the cutting head so
that the two marks line up (
and ) (Fig. 4).
DETAIL TRIMMER AND ATTACHMENTS
Use detail trimmer for sideburns, beard and
mustache, eyebrows, and all detail trimming:
Mustache
Attach detail trimmer and hold trimmer in an
upright position. Bring the tip of the blade
straight into the mustache to trim.
Neckline & Sideburns Attach detail trimmer
and hold the trimmer blade against the skin
at the length desired and move the trimmer
downward.
Comb Attachments
Attach comb to detail trimmer
(Fig. 5) and hold trimmer in
an upright position. Bring
the tip of the blade straight
into the mustache to trim.
2 combs (3 mm, 5 mm) are
included for a variety of
cutting lengths.
TAKING CARE OF YOUR TRIMMER
BLADE CARE
1. Brush away any loose hair that collects in
the blades.
2. Store trimmer in a safe location.
CLEANING TRIMMER
1. Make sure trimmer is OFF. To remove the
trimmer head for cleaning, turn the head
counterclockwise until the “I” mark aligns with
the arrow mark, then lift the head gently.
2. Rinse the head only under water. For proper
functioning of the unit, the handle cannot touch
or be immersed in water (Fig. 6).
3. After cleaning, make sure to shake the head
dry before reattaching it to the body.
4. To reattach the head onto the body, align the
“I” mark on the head with the arrow mark on
the body and then turn clockwise until the “I”
aligns with the circle mark on the body.
Fig.6
Fig. 3
Fig. 1 Fig. 2
Fig. 4
Fig. 5
bsnt1_19pl062448_ib_final 7-9-19.indd 1 7/9/2019 9:50 AM
. Dra sedan
klipphuvudet uppåt (bild 3).
- Placera försiktigt önskat klipphuvud på apparaten och
lås det genom att vrida klipphuvudet till vänster tills de
två markeringarna är i linje med varandra (I & 0) (bild 4).
Använda det cirkelformade klipphuvudet för näsa
och öron
För försiktigt in det cirkelformade klipphuvudet i
näsborren eller örat och för det fram och tillbaka med
små rörelser.
Använda precisionshuvudet för ögonbryn
Sätta på en distanskam
När du vill sätta en distanskam på precisionshuvudet för
ögonbryn kontrollerar du först att apparaten är avstängd.
– Klicka på trimmerhuvudet för 3 mm klipplängd.
– Klicka på trimmerhuvudet för 5 mm klipplängd.
Kamtillbehör
Placera kammen på detaljtrimmern (bild 5) och håll
trimmern upprätt. För bladets topp direkt till ögonbrynet
för att trimma.
2 kammar (3 och 5 mm) ingår för varierande klipplängd.
Bruksanvisning
Om du vill göra ögonbrynet smalare arbetar du från
ögonbrynets insida och tunnar ur med regelbundna
rörelser utåt. Använd klipplängden 5 mm till en början
för att lära känna apparaten. Klipp/raka alltid i hårets
riktning utan att trycka på bladet, eftersom detta kan
orsaka skada på bladet eller dig. Dra ut huden med den
andra handen för en närmare rakning.
UNDERHÅLL
1. Kontrollera att trimmern är i läge OFF. Ta bort
trimmerhuvudet för rengöring genom att vrida
huvudet motsols tills märket ”I” är i linje med pilen och
lyft sedan upp huvudet försiktigt.
2. Skölj huvudet endast under vatten. För att bibehålla
korrekt funktion ska skaftet aldrig vidröra eller doppas
i vatten (bild 6).
3. Var noga med att skaka huvudet torrt efter rengöring
innan du sätter tillbaka det på skaftet.
4. Sätt tillbaka huvudet på skaftet genom att placera
märket ”I” i linje med pilen på skaftet och sedan vrida
medsols till märket ”I” är i linje med cirkelmärket på
skaftet.
NENÄ/KORVA/KULMAKARVATRIMMERI
Lue huolellisesti turvallisuusohjeet ennen laitteen
käyttöä.
Tällä BaByliss-trimmerillä poistat turhat ja liialliset nenä-,
korva- ja kulmakarvat nopeasti ja turvallisesti.
OMINAISUUDET
• Erityinen nenä- ja korvakarvoille tarkoitettu irrotettava
kiertoliike-leikkuupää.
• Erityinen kulmakarvoille tarkoitettu irrotettava tarkka
leikkuupää.
• Leikkuupää kulmakarvojen leikkaamiseen, kaksi
leikkuukorkeutta: 3 ja 5 mm.
LAITTEEN KÄYNNISTÄMINEN
1. Aseta paristo irrottamalla laitteen alaosa (kuva 1).
2. Aseta AA-alkaliparisto plus-napa alaspäin. (Jos laitetta
ei käytetä pitkään aikaan tai jos paristo on tyhjä, poista
paristo laitteesta. Se pidentää pariston käyttöikää.)
3. Kun paristo on asennettu, kohdista nuoli paristokannen
loveen ja käännä oikealle kohdistaaksesi sen ympyrään
(kuva 2).
4. Käynnistä laite kääntämällä paristokantta oikealle.
Laite alkaa toimia, kun “I”-merkki ja paristokannen lovi
ovat samassa linjassa (kuva 2).
5. Käytön jälkeen kytke virta pois kohdistamalla
paristokannen lovi ympyrän kanssa (kuva 2).
Leikkuupäiden asettaminen ja irrottaminen
Varmista, että laite on sammutettu.
- Irrota leikkuupää laitteesta kääntämällä sitä niin, että
merkki (I) on samassa linjassa merkin
IMPORTANT SAFETY
INSTRUCTIONS
READ ALL INSTRUCTIONS
BEFORE USING
FOR HOUSEHOLD
USE ONLY
KEEP AWAY FROM WATER
WARNING
1. Use close supervision when the appliance is
used by, on, or near children or individuals with
certain disabilities.
2. Use appliance only for its intended use as
described in this manual. Use only attachments
recommended by the manufacturer.
3. Never operate the appliance if it is not work-
ing properly, or has been dropped or damaged.
If appliance has fallen into water, do not
reach for it. Drain the water, let the unit dry, be
sure unit is off and then replace the battery.
4. Do not use the appliance with teeth missing
from the blades, as injury may result. Before
each use, make certain the blades are aligned
properly and oiled.
SAVE THESE
INSTRUCTIONS
TROUBLESHOOTING
There are several things to look for if your
trimmer fails to operate:
1. Be sure the trimmer is turned on.
2. Make sure that the battery is properly placed
in the battery compartment. Test the battery to
be sure it is working.
3. Check the blades to see if they are clogged
with hair clippings; if so, use a cleaning brush
to remove hair.
OPERATING
INSTRUCTIONS
1. To insert battery, remove compartment cover
by turning bottom piece of trimmer to the left,
then pulling straight down (Fig. 1).
2. Insert a AA battery, positive terminal
downward. (If you are not going to use the
device for long periods of time or if the battery
is dead, remove the battery from the device.
This will increase the battery's life.)
3. After inserting the battery, align the arrow
with the notch on battery cover and turn to the
right to align with the circle (Fig. 2).
*Do not use in the shower. To clean, simply
rinse trimmer blade under faucet.
4. Always purchase the correct size and grade
of battery most suitable for the intended use.
5. Clean the battery contacts and also those of
the device prior to battery installation.
6. Ensure the battery is installed correctly with
regard to polarity (+ and -).
7. Store unused batteries in their original
packaging, away from metal objects that could
short-circuit them. Never short-circuit batteries.
8. Never dispose of battery in fire, except under
conditions of controlled incineration. Failure
to observe this precaution may result in an
explosion. Never attempt to recharge primary
battery, as this may cause leakage, fire,
or explosion.
9. This appliance is not a toy. Keep away
from children.
GETTING STARTED
NOSE/EAR HAIR TRIMMER
Using the special circular cutting head for nose
and ears, gently insert the cutting head into the
nostril or ear and move it slightly back and forth
to cut the hair.
NOTE: To trim nose hair, insert trimmer at entry
of nostrils and start trimming the lower hairs
until no longer visible.
To trim ear hair, guide the trimmer around the
outer surface of the ear.
TO SWITCH TRIMMER HEADS
Check that the device is turned off.
• Remove the trimming head of the device by
turning it to line-up mark (
) with mark ( ).
Next, pull the head of the device upward (Fig. 3).
• Gently place the desired cutting head on the
device, then lock by turning the cutting head so
that the two marks line up (
and ) (Fig. 4).
DETAIL TRIMMER AND ATTACHMENTS
Use detail trimmer for sideburns, beard and
mustache, eyebrows, and all detail trimming:
Mustache
Attach detail trimmer and hold trimmer in an
upright position. Bring the tip of the blade
straight into the mustache to trim.
Neckline & Sideburns Attach detail trimmer
and hold the trimmer blade against the skin
at the length desired and move the trimmer
downward.
Comb Attachments
Attach comb to detail trimmer
(Fig. 5) and hold trimmer in
an upright position. Bring
the tip of the blade straight
into the mustache to trim.
2 combs (3 mm, 5 mm) are
included for a variety of
cutting lengths.
TAKING CARE OF YOUR TRIMMER
BLADE CARE
1. Brush away any loose hair that collects in
the blades.
2. Store trimmer in a safe location.
CLEANING TRIMMER
1. Make sure trimmer is OFF. To remove the
trimmer head for cleaning, turn the head
counterclockwise until the “I” mark aligns with
the arrow mark, then lift the head gently.
2. Rinse the head only under water. For proper
functioning of the unit, the handle cannot touch
or be immersed in water (Fig. 6).
3. After cleaning, make sure to shake the head
dry before reattaching it to the body.
4. To reattach the head onto the body, align the
“I” mark on the head with the arrow mark on
the body and then turn clockwise until the “I”
aligns with the circle mark on the body.
Fig.6
Fig. 3
Fig. 1 Fig. 2
Fig. 4
Fig. 5
bsnt1_19pl062448_ib_final 7-9-19.indd 1 7/9/2019 9:50 AM
kanssa. Vedä
laitteen päätä ylöspäin (kuva 3)
- Aseta haluamasi leikkuupää varovasti laitteeseen ja
lukitse leikkuupää kääntämällä sitä niin, että merkit (I &
0) ovat samassa linjassa (kuva 4).
Erityisen nenä- ja korvakarvoille tarkoitetun
kiertoliike-leikkuupään käyttö
Aseta kiertoliike-leikkuupää varovasti nenänreikään tai
korvaan ja liikuta sitä kevyin liikkein edestakaisin.
Erityisen kulmakarvoille tarkoitetun tarkan
leikkuupään käyttö
Leikkuupään asettaminen
Ennen kuin asetat leikkuupään kulmakarvoille
tarkoitettuun tarkkaan leikkuupäähän, varmista että laite
on sammutettu.
- Käyttääksesi 3 mm:n leikkuukorkeutta napsauta se
trimmerin päähän.
- Käyttääksesi 5 mm:n leikkuukorkeutta napsauta se
trimmerin päähän.
Kampaosat
Liitä kampa tarkkuustrimmeriin (kuva 5) ja pidä trimmeriä
pystysuorassa asennossa. Aseta terän kärki suoraan
leikattaviin kulmakarvoihin.
2. kammat (3 mm, 5 mm) tarjoavat useita
leikkuukorkeuksia.
Käyttöohjeet
Kun haluat ohentaa kulmakarvoja, aloita kulmakarvojen
sisäreunasta ja leikkaa karvat säännöllisillä liikkeillä
liikkumalla ulkoreunaan päin. Aloita laitteeseen
tutustuminen käyttämällä 5 mm:n leikkuukorkeutta.
Leikkaa/aja kulmakarvat aina niiden kasvusuunnan
mukaisesti painamatta ajoterää. Muuten saatat
vahingoittaa terän tai leikata haavan ihoosi. Kiristä ihoa
vapaalla kädelläsi, jotta voit leikata karvat lähempää ihoa.
HUOLTO
1. Varmista, että trimmeri on POIS PÄÄLTÄ. Irrota
trimmerin pää puhdistusta varten kääntämällä sitä
vastapäivään niin, että merkki «I» on samassa linjassa
nuolen kanssa. Nosta sitten päätä varoen.
2. Huuhtele vain pää vedessä. Jotta laite toimii
asianmukaisesti, varsi ei saa olla kosketuksissa veden
kanssa tai sitä ei saa upottaa veteen (kuva 6).
3. Ravista pää kuivaksi puhdistuksen jälkeen, ennen kuin
asetat sen takaisin laitteen runkoon.
4. Kiinnitä pää takaisin runkoon kohdistamalla pään
merkki «I» rungon nuolimerkin kanssa, ja käännä sitten
vastapäivään niin, että merkki «I» on linjassa rungon
ympyrämerkin kanssa.
ORRSZŐR, FÜLSZŐR ÉS SZEMÖLDÖKVÁGÓ KÉSZÜLÉK
A készülék használata előtt olvassa el figyelmesen a
biztonsági utasításokat!
Ez a BaByliss készülék a szemöldökön, az orrban és a fülben
lévő nemkívánatos vagy kellemetlen szőrszálak gyors és
biztonságos eltávolítására szolgál.
JELLEMZŐK
• Speciális, az orr-és fülszőrzethez való kivehető körvágó fej.
• Kivehető, speciális, precíziós vágófej szemöldökhöz.
• Vezetőfésű a szemöldök 2 vágásmagasságához: 3 és 5 mm
hosszúságúra történő vágásához.
A KÉSZÜLÉK BEKAPCSOLÁSA
1. Az elem behelyezéséhez csavarja le a készülék alsó részét
(1. ábra).
2. Helyezzen be egy AA alkáli elemet a pozitív pólussal lefelé.
(Ha a készüléket hosszabb ideig nem használja, vagy ha
az elem lemerült, vegye ki a készülékből. Ezáltal tovább
növelheti az elemek élettartamát.)
3. Az elem behelyezése után igazítsa a nyilat a fedélen lévő
horonyhoz és forgassa jobbra, hogy egy vonalba kerüljön
a körrel (2. ábra).
4. A készülék bekapcsolásához forgassa el az elemtartó
rekeszt jobbra. A készülék bekapcsolódik, amikor az „I”
jelzés az elemtartó fedélen lévő horonnyal egy vonalba
kerül. (2. ábra)
5. Használat után a készülék kikapcsolásához az elemtartó
fedélen lévő hornyot igazítsa a körhöz. (2. ábra)
A vágófejek rögzítése és levétele
Ellenőrizze, hogy a készülék ki van kapcsolva.
- A készülék vágófejének levétele a vágófej elfordításával
történik úgy, hogy a ( I) jel a
IMPORTANT SAFETY
INSTRUCTIONS
READ ALL INSTRUCTIONS
BEFORE USING
FOR HOUSEHOLD
USE ONLY
KEEP AWAY FROM WATER
WARNING
1. Use close supervision when the appliance is
used by, on, or near children or individuals with
certain disabilities.
2. Use appliance only for its intended use as
described in this manual. Use only attachments
recommended by the manufacturer.
3. Never operate the appliance if it is not work-
ing properly, or has been dropped or damaged.
If appliance has fallen into water, do not
reach for it. Drain the water, let the unit dry, be
sure unit is off and then replace the battery.
4. Do not use the appliance with teeth missing
from the blades, as injury may result. Before
each use, make certain the blades are aligned
properly and oiled.
SAVE THESE
INSTRUCTIONS
TROUBLESHOOTING
There are several things to look for if your
trimmer fails to operate:
1. Be sure the trimmer is turned on.
2. Make sure that the battery is properly placed
in the battery compartment. Test the battery to
be sure it is working.
3. Check the blades to see if they are clogged
with hair clippings; if so, use a cleaning brush
to remove hair.
OPERATING
INSTRUCTIONS
1. To insert battery, remove compartment cover
by turning bottom piece of trimmer to the left,
then pulling straight down (Fig. 1).
2. Insert a AA battery, positive terminal
downward. (If you are not going to use the
device for long periods of time or if the battery
is dead, remove the battery from the device.
This will increase the battery's life.)
3. After inserting the battery, align the arrow
with the notch on battery cover and turn to the
right to align with the circle (Fig. 2).
*Do not use in the shower. To clean, simply
rinse trimmer blade under faucet.
4. Always purchase the correct size and grade
of battery most suitable for the intended use.
5. Clean the battery contacts and also those of
the device prior to battery installation.
6. Ensure the battery is installed correctly with
regard to polarity (+ and -).
7. Store unused batteries in their original
packaging, away from metal objects that could
short-circuit them. Never short-circuit batteries.
8. Never dispose of battery in fire, except under
conditions of controlled incineration. Failure
to observe this precaution may result in an
explosion. Never attempt to recharge primary
battery, as this may cause leakage, fire,
or explosion.
9. This appliance is not a toy. Keep away
from children.
GETTING STARTED
NOSE/EAR HAIR TRIMMER
Using the special circular cutting head for nose
and ears, gently insert the cutting head into the
nostril or ear and move it slightly back and forth
to cut the hair.
NOTE: To trim nose hair, insert trimmer at entry
of nostrils and start trimming the lower hairs
until no longer visible.
To trim ear hair, guide the trimmer around the
outer surface of the ear.
TO SWITCH TRIMMER HEADS
Check that the device is turned off.
• Remove the trimming head of the device by
turning it to line-up mark (
) with mark ( ).
Next, pull the head of the device upward (Fig. 3).
• Gently place the desired cutting head on the
device, then lock by turning the cutting head so
that the two marks line up (
and ) (Fig. 4).
DETAIL TRIMMER AND ATTACHMENTS
Use detail trimmer for sideburns, beard and
mustache, eyebrows, and all detail trimming:
Mustache
Attach detail trimmer and hold trimmer in an
upright position. Bring the tip of the blade
straight into the mustache to trim.
Neckline & Sideburns Attach detail trimmer
and hold the trimmer blade against the skin
at the length desired and move the trimmer
downward.
Comb Attachments
Attach comb to detail trimmer
(Fig. 5) and hold trimmer in
an upright position. Bring
the tip of the blade straight
into the mustache to trim.
2 combs (3 mm, 5 mm) are
included for a variety of
cutting lengths.
TAKING CARE OF YOUR TRIMMER
BLADE CARE
1. Brush away any loose hair that collects in
the blades.
2. Store trimmer in a safe location.
CLEANING TRIMMER
1. Make sure trimmer is OFF. To remove the
trimmer head for cleaning, turn the head
counterclockwise until the “I” mark aligns with
the arrow mark, then lift the head gently.
2. Rinse the head only under water. For proper
functioning of the unit, the handle cannot touch
or be immersed in water (Fig. 6).
3. After cleaning, make sure to shake the head
dry before reattaching it to the body.
4. To reattach the head onto the body, align the
“I” mark on the head with the arrow mark on
the body and then turn clockwise until the “I”
aligns with the circle mark on the body.
Fig.6
Fig. 3
Fig. 1 Fig. 2
Fig. 4
Fig. 5
bsnt1_19pl062448_ib_final 7-9-19.indd 1 7/9/2019 9:50 AM
jellel egy vonalba essen.
Ezután húzza felfelé a készülék fejét (3. ábra)
- Helyezze óvatosan a kívánt vágófejet a készülékre, majd
rögzítse a vágófej elfordításával úgy, hogy a két (I & 0) jel
egy vonalba essen (4. ábra).
Az orr- és fülszőrzethez való speciális körvágó fej
használata
Vezesse be óvatosan a körvágó fejet az orrlyukba vagy a
fülkagylóba és könnyed oda-vissza mozgást végezzen a
készülékkel.
A szemöldökhöz való speciális precíziós vágófej
használata
A vezetőfésű felhelyezése
Mielőtt a vágóbetétet ráhelyezné a speciális precíziós
szemöldökvágó fejre, ellenőrizze, hogy a készülék ki van-e
kapcsolva.
- A 3 mm-es vágási magassághoz rögzítse a vezetőfésűt a
vágófejre.
- Az 5 mm-es vágási magassághoz rögzítse a vezetőfésűt a
vágófejre.
Vezetőfésűk
Rögzítse a vezetőfésűt a készülékre (5. ábra) és tartsa a
készüléket függőlegesen. A vágókés hegyével borotválja a
szemöldököket.
Két vezetőfésű (3 és 5 mm) tartozik a készülékhez és
különböző vágási magasságot biztosítanak.
Használati tanácsok
A szemöldök tömegének nomításához haladjon egyenletes
sebességgel a szemöldök belső szélétől a külső széle felé.
Kezdéskor és a készülék megismerése érdekében először
az 5 mm-es vezetőfésűt használja. A szemöldököt mindig a
szőrszálak növekedési irányában vágja / borotválja, a penge
megnyomása nélkül, ami a penge károsodását vagy a bőr
sérülését okozhatja. A szabad kezével feszítse meg a bőrét az
alaposabb borotválás érdekében.
KARBANTARTÁS
1. Győződjön meg róla, hogy a készülék ki van kapcsolva.
Tisztításnál a vágófej eltávolításához forgassa az óramutató
járásával ellentétes irányba, hogy az „ I ” jelzés egy vonalba
kerüljön a nyíllal. Ezután óvatosan vegye le a vágófejet.
2. Csak vízzel öblítse le a vágófejet. A készülék megfelelő
működésének megőrzése érdekében ne érje víz és ne
mártsa vízbe a markolatot (6. ábra).
3. A tisztítás után rázza ki a fejből a vizet, hogy teljesen száraz
legyen, mielőtt visszateszi a készülékre.
4. A vágófej készülékre rögzítéséhez igazítsa a vágófejen lévő
„ I ” jelzést a készüléktesten lévő nyílhoz, majd forgassa el
a vágófejet az óramutató járásával egyező irányba addig,
amíg az „ I ” jelzés a készüléktesten lévő körhöz kerül.
ZASTŘIHOVAČ CHLOUPKŮ V NOSE/UŠÍCH/OBOČÍ
Před použitím přístroje si prosím pozorně přečtěte
bezpečnostní pokyny.
Tento zastřihovač od společnosti Babyliss je určen k
rychlému a bezpečnému odstraňování nežádoucích a
nevzhledných chloupků v oblasti obočí, nosu a uší.
TECHNICKÉ ÚDAJE
• Speciální zastřihávací otočná snímatelná hlavice určená
pro odstraňování nežádoucích chloupků v nose či v
oblasti uší.
• Speciální zastřihávací odnímatelná hlavice určená pro
oblast obočí.
• Nástavec pro zastřihávání obočí s možností nastavení
dvou délek: 3 a 5 mm.
SPUŠTĚNÍ PŘÍSTROJE
1. Odšroubujte spodní část zastřihovače (viz obr. 1) a
vložte baterii.
2. Vložte alkalickou baterii AA kladným pólem dolů.
(Pokud zastřihovač není používán po delší dobu nebo
v případě nízkého stavu nabití baterie, vyjměte ji ze
zastřihovače. Tímto prodloužíte jeho životnost).
3. Po vložení baterie zarovnejte šipku se zářezem na krytu
baterie a otočením doprava zarovnejte s kroužkem
(obr.2)
4. Zapněte přístroj otočením krytu baterie doprava.
Přístroj začne fungovat, jakmile bude značka „I“
zarovnaná se zářezem na krytu baterie. (Obr. 2)
5. Po použití vypněte napájení zarovnáním zářezu na
krytu baterie s kroužkem. (Obr. 2)
Připojení a vyjmutí střihacích hlav
Zkontrolujte, zda je přístroj vypnutý.
- Zastřihávací hlavici sundejte jejím otočením do pozice,
kdy se setkají obě značky na zastřihovači (I) a na hlavici
IMPORTANT SAFETY
INSTRUCTIONS
READ ALL INSTRUCTIONS
BEFORE USING
FOR HOUSEHOLD
USE ONLY
KEEP AWAY FROM WATER
WARNING
1. Use close supervision when the appliance is
used by, on, or near children or individuals with
certain disabilities.
2. Use appliance only for its intended use as
described in this manual. Use only attachments
recommended by the manufacturer.
3. Never operate the appliance if it is not work-
ing properly, or has been dropped or damaged.
If appliance has fallen into water, do not
reach for it. Drain the water, let the unit dry, be
sure unit is off and then replace the battery.
4. Do not use the appliance with teeth missing
from the blades, as injury may result. Before
each use, make certain the blades are aligned
properly and oiled.
SAVE THESE
INSTRUCTIONS
TROUBLESHOOTING
There are several things to look for if your
trimmer fails to operate:
1. Be sure the trimmer is turned on.
2. Make sure that the battery is properly placed
in the battery compartment. Test the battery to
be sure it is working.
3. Check the blades to see if they are clogged
with hair clippings; if so, use a cleaning brush
to remove hair.
OPERATING
INSTRUCTIONS
1. To insert battery, remove compartment cover
by turning bottom piece of trimmer to the left,
then pulling straight down (Fig. 1).
2. Insert a AA battery, positive terminal
downward. (If you are not going to use the
device for long periods of time or if the battery
is dead, remove the battery from the device.
This will increase the battery's life.)
3. After inserting the battery, align the arrow
with the notch on battery cover and turn to the
right to align with the circle (Fig. 2).
*Do not use in the shower. To clean, simply
rinse trimmer blade under faucet.
4. Always purchase the correct size and grade
of battery most suitable for the intended use.
5. Clean the battery contacts and also those of
the device prior to battery installation.
6. Ensure the battery is installed correctly with
regard to polarity (+ and -).
7. Store unused batteries in their original
packaging, away from metal objects that could
short-circuit them. Never short-circuit batteries.
8. Never dispose of battery in fire, except under
conditions of controlled incineration. Failure
to observe this precaution may result in an
explosion. Never attempt to recharge primary
battery, as this may cause leakage, fire,
or explosion.
9. This appliance is not a toy. Keep away
from children.
GETTING STARTED
NOSE/EAR HAIR TRIMMER
Using the special circular cutting head for nose
and ears, gently insert the cutting head into the
nostril or ear and move it slightly back and forth
to cut the hair.
NOTE: To trim nose hair, insert trimmer at entry
of nostrils and start trimming the lower hairs
until no longer visible.
To trim ear hair, guide the trimmer around the
outer surface of the ear.
TO SWITCH TRIMMER HEADS
Check that the device is turned off.
• Remove the trimming head of the device by
turning it to line-up mark (
) with mark ( ).
Next, pull the head of the device upward (Fig. 3).
• Gently place the desired cutting head on the
device, then lock by turning the cutting head so
that the two marks line up (
and ) (Fig. 4).
DETAIL TRIMMER AND ATTACHMENTS
Use detail trimmer for sideburns, beard and
mustache, eyebrows, and all detail trimming:
Mustache
Attach detail trimmer and hold trimmer in an
upright position. Bring the tip of the blade
straight into the mustache to trim.
Neckline & Sideburns Attach detail trimmer
and hold the trimmer blade against the skin
at the length desired and move the trimmer
downward.
Comb Attachments
Attach comb to detail trimmer
(Fig. 5) and hold trimmer in
an upright position. Bring
the tip of the blade straight
into the mustache to trim.
2 combs (3 mm, 5 mm) are
included for a variety of
cutting lengths.
TAKING CARE OF YOUR TRIMMER
BLADE CARE
1. Brush away any loose hair that collects in
the blades.
2. Store trimmer in a safe location.
CLEANING TRIMMER
1. Make sure trimmer is OFF. To remove the
trimmer head for cleaning, turn the head
counterclockwise until the “I” mark aligns with
the arrow mark, then lift the head gently.
2. Rinse the head only under water. For proper
functioning of the unit, the handle cannot touch
or be immersed in water (Fig. 6).
3. After cleaning, make sure to shake the head
dry before reattaching it to the body.
4. To reattach the head onto the body, align the
“I” mark on the head with the arrow mark on
the body and then turn clockwise until the “I”
aligns with the circle mark on the body.
Fig.6
Fig. 3
Fig. 1 Fig. 2
Fig. 4
Fig. 5
bsnt1_19pl062448_ib_final 7-9-19.indd 1 7/9/2019 9:50 AM
. Poté hlavici vysuňte směrem nahoru (obr. 3)
- Opatrně umístěte zvolenou zastřihávací hlavici do
zastřihovače, poté otočte hlavicí až se setkají obě značky
(I & 0) (obr. 4), čímž hlavici uzamknete.
Používání speciální otočné hlavice pro odstraňování
nežádoucích chloupků v nose a uších
Opatrně vložte zastřihávací hlavici do nosní dírky nebo
do ucha a pomalými pohyby postupujte směrem dovnitř
a ven.
Používání speciální zastřihávací hlavice určené pro
oblast obočí
Umístění střihacího nástavce
Zastřihovač nejprve vypněte a poté nasaďte speciální
hlavici pro oblast obočí.
- Pro výšku střihu 3 mm, zacvakněte na zastřihovací hlavu.
- Pro výšku střihu 5 mm, zacvakněte na zastřihovací hlavu.
Hřebenové nástavce
Připojte hřeben na přesný zastřihovač (obr.5) a
zastřihovač držte ve svislé poloze. Špičku ostří veďte
přímo do obočí, které chcete zastřihovat.
2. Hřebeny (3 mm, 5 mm) pro různé délky střihu jsou
součástí balení.
Návod k použití
Pro zúžení obočí postupujte od vnitřní strany obočí
pravidelnými pohyby směrem k vnější straně. Pro začátek,
než si tento nástavec osvojíte, používejte 5mm nástavec.
Vždy stříhejte ve směru růstu obočí a vyhýbejte se tlaku
na lamelu. Mohlo by dojít k poškození zastřihovače či k
vašemu poranění. Volnou rukou napněte pokožku, tím
přispějete přesnému zastřižení.
ÚDRŽBA
1. Ujistěte se, že je zastřihovač vypnutý v poloze OFF.
Pokud chcete zastřihovací hlavu vyčistit, otočte ji proti
směru hodinových ručiček, dokud nebude značka „I”
zarovnaná se značkou šipky, poté hlavu jemně vyjměte.
2. Hlavu oplachujte pouze pod vodou. Pro správné
fungování přístroje se rukojeť nesmí dotknout ani
ponořit do vody (obr.6).
3. Po čištění hlavu protřepejte, aby byla suchá, než ji
znovu připojíte k tělu přístroje.
4. Chcete-li znovu připojit hlavu k tělu, zarovnejte značku
„I“ se značkou šipky na těle přístroje a otočte po
směru hodinových ručiček, dokud nebude značka «I»
zarovnaná s kroužkem na těle přístroje.
KLIPPEMASKIN FOR NESE/ØRER/ØYENBRYN
Les disse sikkerhetsanvisningene grundig før apparatet tas
i bruk.
Denne klippemaskinen fra BaByliss gjør det mulig å erne
uønskede eller skjemmende hår fra øyenbryn, i nese og
ører på en rask og sikker måte.
EGENSKAPER
• Avtakbart sirkulært kuttehode, spesielt til nese og ører.
• Avtakbart kuttehode, spesielt til presisjonskutting av
øyenbryn.
• Klippekam for trimming av øyenbryn i 2 ulike lengder: 3
og 5 mm.
START AV APPARATET
1. For å sette inn et batteri, skru av apparatets nederste del
(Fig. 1).
2. Sett inn ett alkalisk AA-batteri, med positiv pol nedover.
(Dersom apparatet ikke er i bruk i lengre perioder, eller
hvis batteriet er utladet, skal batteriet tas ut av apparatet.
Dette bidrar også til å forlenge levetiden.)
3. Når batteriet er satt inn, juster posisjonen slik at pilen
peker på hakket i batteridekslet, og drei deretter mot
høyre slik at den peker på sirkelen (Fig. 2).
4. Slå på apparatet ved å vri batteridekselet til høyre.
Apparatet vil starte når “I”-merket og hakket på
batteridekselet er innrettet (Fig. 2).
5. Etter bruk slå av apparatet med å la hakket på
batteridekselet være innrettet med sirkelen (Fig. 2).
Sette på og ta av kuttehodene
Forsikre deg om at apparatet er slått av.
- Fjern kuttehodet fra apparatet ved å vippe det for å la
merket (I) stå overfor merket
IMPORTANT SAFETY
INSTRUCTIONS
READ ALL INSTRUCTIONS
BEFORE USING
FOR HOUSEHOLD
USE ONLY
KEEP AWAY FROM WATER
WARNING
1. Use close supervision when the appliance is
used by, on, or near children or individuals with
certain disabilities.
2. Use appliance only for its intended use as
described in this manual. Use only attachments
recommended by the manufacturer.
3. Never operate the appliance if it is not work-
ing properly, or has been dropped or damaged.
If appliance has fallen into water, do not
reach for it. Drain the water, let the unit dry, be
sure unit is off and then replace the battery.
4. Do not use the appliance with teeth missing
from the blades, as injury may result. Before
each use, make certain the blades are aligned
properly and oiled.
SAVE THESE
INSTRUCTIONS
TROUBLESHOOTING
There are several things to look for if your
trimmer fails to operate:
1. Be sure the trimmer is turned on.
2. Make sure that the battery is properly placed
in the battery compartment. Test the battery to
be sure it is working.
3. Check the blades to see if they are clogged
with hair clippings; if so, use a cleaning brush
to remove hair.
OPERATING
INSTRUCTIONS
1. To insert battery, remove compartment cover
by turning bottom piece of trimmer to the left,
then pulling straight down (Fig. 1).
2. Insert a AA battery, positive terminal
downward. (If you are not going to use the
device for long periods of time or if the battery
is dead, remove the battery from the device.
This will increase the battery's life.)
3. After inserting the battery, align the arrow
with the notch on battery cover and turn to the
right to align with the circle (Fig. 2).
*Do not use in the shower. To clean, simply
rinse trimmer blade under faucet.
4. Always purchase the correct size and grade
of battery most suitable for the intended use.
5. Clean the battery contacts and also those of
the device prior to battery installation.
6. Ensure the battery is installed correctly with
regard to polarity (+ and -).
7. Store unused batteries in their original
packaging, away from metal objects that could
short-circuit them. Never short-circuit batteries.
8. Never dispose of battery in fire, except under
conditions of controlled incineration. Failure
to observe this precaution may result in an
explosion. Never attempt to recharge primary
battery, as this may cause leakage, fire,
or explosion.
9. This appliance is not a toy. Keep away
from children.
GETTING STARTED
NOSE/EAR HAIR TRIMMER
Using the special circular cutting head for nose
and ears, gently insert the cutting head into the
nostril or ear and move it slightly back and forth
to cut the hair.
NOTE: To trim nose hair, insert trimmer at entry
of nostrils and start trimming the lower hairs
until no longer visible.
To trim ear hair, guide the trimmer around the
outer surface of the ear.
TO SWITCH TRIMMER HEADS
Check that the device is turned off.
• Remove the trimming head of the device by
turning it to line-up mark (
) with mark ( ).
Next, pull the head of the device upward (Fig. 3).
• Gently place the desired cutting head on the
device, then lock by turning the cutting head so
that the two marks line up (
and ) (Fig. 4).
DETAIL TRIMMER AND ATTACHMENTS
Use detail trimmer for sideburns, beard and
mustache, eyebrows, and all detail trimming:
Mustache
Attach detail trimmer and hold trimmer in an
upright position. Bring the tip of the blade
straight into the mustache to trim.
Neckline & Sideburns Attach detail trimmer
and hold the trimmer blade against the skin
at the length desired and move the trimmer
downward.
Comb Attachments
Attach comb to detail trimmer
(Fig. 5) and hold trimmer in
an upright position. Bring
the tip of the blade straight
into the mustache to trim.
2 combs (3 mm, 5 mm) are
included for a variety of
cutting lengths.
TAKING CARE OF YOUR TRIMMER
BLADE CARE
1. Brush away any loose hair that collects in
the blades.
2. Store trimmer in a safe location.
CLEANING TRIMMER
1. Make sure trimmer is OFF. To remove the
trimmer head for cleaning, turn the head
counterclockwise until the “I” mark aligns with
the arrow mark, then lift the head gently.
2. Rinse the head only under water. For proper
functioning of the unit, the handle cannot touch
or be immersed in water (Fig. 6).
3. After cleaning, make sure to shake the head
dry before reattaching it to the body.
4. To reattach the head onto the body, align the
“I” mark on the head with the arrow mark on
the body and then turn clockwise until the “I”
aligns with the circle mark on the body.
Fig.6
Fig. 3
Fig. 1 Fig. 2
Fig. 4
Fig. 5
bsnt1_19pl062448_ib_final 7-9-19.indd 1 7/9/2019 9:50 AM
. Dra så apparatets hode
oppover (Fig. 3).
- Plasser forsiktig det ønskede kuttehodet på apparatet, og
lås det ved å la de to merkene (I & 0) stå overfor hverandre
(Fig. 4).
Bruk av kuttehodet med sirkulært klippesystem,
spesielt til nese og ører
Plasser forsiktig det sirkulære kuttehodet inn i neseboret
eller øret, og utfør forsiktige bevegelser frem og tilbake.
Bruk av kuttehodet spesielt til presisjonskutting av
øyenbryn
Plassering av klippekammen
For å plassere klippekammen på kuttehodet spesielt til
presisjonskutting av øyenbryn, sørg for at apparatet er
slått av.
- For 3 mm kuttelengde, festes på kuttehodet med et klikk.
- For 5 mm kuttelengde, festes på kuttehodet med et klikk.
Kamtilbehør
Sett kammen på kuttehodet for presisjonskutting (Fig. 5)
og hold klippemaskinen i stående posisjon. Før enden av
bladet rett inn i øyebrynet for å klippe.
To kammer (3 mm, 5 mm) er inkludert for å kunne variere
kuttelengden.
Råd til brukeren
For å tynne ut øyenbrynene, klipp fra øyenbrynets indre
kant, og tynn ut med jevne bevegelser utover. Bruk
klippekammen på 5 mm for å begynne, og for å bli kjent
med apparatet. Alltid klippe / barbere i retningen til
hårveksten uten å legge trykk på bladet, noe som kan
skade bladet eller forårsake en hudskade. Stram huden
med den ledige hånden for å tillate en barbering tettere
på huden.
VEDLIKEHOLD
1. Forsikre deg om at klippemaskinen er OFF (AV). For å
erne kuttehodet for rengjøring, drei hodet i retningen
mot klokken til merket «I» står rett ovenfor pilen, og løft
deretter hodet forsiktig.
2. Skyll hodet under vann. For at apparatet skal fungere
korrekt er det viktig at håndtaket ikke legges i vann eller
kommer i kontakt med vann (Fig. 6).
3. Etter rengjøring bør hodet rystes og tørkes helt før det
monteres tilbake på apparatets hoveddel.
4. For å sette hodet tilbake på hoveddelen, plasser delene
slik at merket «I» står rett ovenfor pilmarkeringen
på hoveddelen og drei hodet deretter i retningen
med klokken til «I»-markeringen er rett ovenfor
sirkelmarkeringen på hoveddelen.
ΚΟΥΡΕΥΤΙΚΗ ΜΗΧΑΝΗ ΓΙΑ ΑΥΤΙΑ, ΜΥΤΗ ΚΑΙ ΦΡΥΙΑ
Πριν από οποιαδήποτε χρήση της συσκευής, διαβάστε προσεκτικά τις
οδηγίες ασφαλείας.
Αυτή η κουρευτική μηχανή BaByliss επιτρέπει τη γρήγορη και απόλυτα
ασφαλή αφαίρεση των ανεπιθύμητων ή αντιαισθητικών τριχών από
τα φρύδια, τα αυτιά και τη μύτη.
ΧΑΡΑΚΤΗΡΙΣΤΙΚΑ
• Αποσπώμενη κυκλική κεφαλή κοπής για τα αυτιά και τη μύτη.
• Αποσπώμενη κεφαλή κοπής ακριβείας για τα φρύδια.
• Οδηγός κοπής για το κόψιμο των φρυδιών σε 2 μήκη: 3 και 5 mm.
ΘΕΣΗ ΣΕ ΛΕΙΤΟΥΡΓΙΑ ΤΗΣ ΣΥΣΚΕΥΗΣ
1. Για να τοποθετήσετε την μπαταρία, ξεβιδώστε το κάτω τμήμα της
συσκευής (Εικ. 1).
2. Εισάγετε μια αλκαλική μπαταρία AΑ, με τον θετικό πόλο προς τα
κάτω. (Εάν η συσκευή δεν χρησιμοποιείται για παρατεταμένα
διαστήματα ή εάν η μπαταρία φτάνει στο τέλος της ζωής της,
βγάλτε την από τη συσκευή. Αυτό θα συμβάλλει στην παράταση
της διάρκειας ζωής της.)
3. Αφού τοποθετήσετε τη μπαταρία εντός της συσκευής,
ευθυγραμμίστε το βέλος με την εγκοπή στο κάλυμμα των
μπαταριών και περιστρέψτε προς τα δεξιά για να ευθυγραμμιστεί
με τον κύκλο (Σχ. 2).
4. Ενεργοποιήστε τη συσκευή περιστρέφοντας το κάλυμμα της
μπαταρίας προς τα δεξιά. Η συσκευή θα τεθεί σε λειτουργία όταν
η ένδειξη «Ι» ευθυγραμμιστεί με την εγκοπή στο κάλυμμα της
μπαταρίας. (Σχ. 2)
5. Μετά τη χρήση, απενεργοποιήστε τη συσκευή ευθυγραμμίζοντας
την εγκοπή στο κάλυμμα της μπαταρίας με την κυκλική ένδειξη.
(Σχ. 2)
Τοποθέτηση και αφαίρεση των κεφαλών κοπή
Βεβαιωθείτε ότι έχετε σβήσει τη συσκευή.
- Αποσπάστε την κεφαλή κοπής από τη συσκευή περιστρέφοντάς την
ώστε η ένδειξη (
I
) να συμπίπτει με την ένδειξη
IMPORTANT SAFETY
INSTRUCTIONS
READ ALL INSTRUCTIONS
BEFORE USING
FOR HOUSEHOLD
USE ONLY
KEEP AWAY FROM WATER
WARNING
1. Use close supervision when the appliance is
used by, on, or near children or individuals with
certain disabilities.
2. Use appliance only for its intended use as
described in this manual. Use only attachments
recommended by the manufacturer.
3. Never operate the appliance if it is not work-
ing properly, or has been dropped or damaged.
If appliance has fallen into water, do not
reach for it. Drain the water, let the unit dry, be
sure unit is off and then replace the battery.
4. Do not use the appliance with teeth missing
from the blades, as injury may result. Before
each use, make certain the blades are aligned
properly and oiled.
SAVE THESE
INSTRUCTIONS
TROUBLESHOOTING
There are several things to look for if your
trimmer fails to operate:
1. Be sure the trimmer is turned on.
2. Make sure that the battery is properly placed
in the battery compartment. Test the battery to
be sure it is working.
3. Check the blades to see if they are clogged
with hair clippings; if so, use a cleaning brush
to remove hair.
OPERATING
INSTRUCTIONS
1. To insert battery, remove compartment cover
by turning bottom piece of trimmer to the left,
then pulling straight down (Fig. 1).
2. Insert a AA battery, positive terminal
downward. (If you are not going to use the
device for long periods of time or if the battery
is dead, remove the battery from the device.
This will increase the battery's life.)
3. After inserting the battery, align the arrow
with the notch on battery cover and turn to the
right to align with the circle (Fig. 2).
*Do not use in the shower. To clean, simply
rinse trimmer blade under faucet.
4. Always purchase the correct size and grade
of battery most suitable for the intended use.
5. Clean the battery contacts and also those of
the device prior to battery installation.
6. Ensure the battery is installed correctly with
regard to polarity (+ and -).
7. Store unused batteries in their original
packaging, away from metal objects that could
short-circuit them. Never short-circuit batteries.
8. Never dispose of battery in fire, except under
conditions of controlled incineration. Failure
to observe this precaution may result in an
explosion. Never attempt to recharge primary
battery, as this may cause leakage, fire,
or explosion.
9. This appliance is not a toy. Keep away
from children.
GETTING STARTED
NOSE/EAR HAIR TRIMMER
Using the special circular cutting head for nose
and ears, gently insert the cutting head into the
nostril or ear and move it slightly back and forth
to cut the hair.
NOTE: To trim nose hair, insert trimmer at entry
of nostrils and start trimming the lower hairs
until no longer visible.
To trim ear hair, guide the trimmer around the
outer surface of the ear.
TO SWITCH TRIMMER HEADS
Check that the device is turned off.
• Remove the trimming head of the device by
turning it to line-up mark (
) with mark ( ).
Next, pull the head of the device upward (Fig. 3).
• Gently place the desired cutting head on the
device, then lock by turning the cutting head so
that the two marks line up (
and ) (Fig. 4).
DETAIL TRIMMER AND ATTACHMENTS
Use detail trimmer for sideburns, beard and
mustache, eyebrows, and all detail trimming:
Mustache
Attach detail trimmer and hold trimmer in an
upright position. Bring the tip of the blade
straight into the mustache to trim.
Neckline & Sideburns Attach detail trimmer
and hold the trimmer blade against the skin
at the length desired and move the trimmer
downward.
Comb Attachments
Attach comb to detail trimmer
(Fig. 5) and hold trimmer in
an upright position. Bring
the tip of the blade straight
into the mustache to trim.
2 combs (3 mm, 5 mm) are
included for a variety of
cutting lengths.
TAKING CARE OF YOUR TRIMMER
BLADE CARE
1. Brush away any loose hair that collects in
the blades.
2. Store trimmer in a safe location.
CLEANING TRIMMER
1. Make sure trimmer is OFF. To remove the
trimmer head for cleaning, turn the head
counterclockwise until the “I” mark aligns with
the arrow mark, then lift the head gently.
2. Rinse the head only under water. For proper
functioning of the unit, the handle cannot touch
or be immersed in water (Fig. 6).
3. After cleaning, make sure to shake the head
dry before reattaching it to the body.
4. To reattach the head onto the body, align the
“I” mark on the head with the arrow mark on
the body and then turn clockwise until the “I”
aligns with the circle mark on the body.
Fig.6
Fig. 3
Fig. 1 Fig. 2
Fig. 4
Fig. 5
bsnt1_19pl062448_ib_final 7-9-19.indd 1 7/9/2019 9:50 AM
. Στη συνέχεια,
τραβήξτε την κεφαλή της συσκευής προς τα πάνω (Εικ. 3).
- Τοποθετήστε προσεκτικά την επιθυμητή κεφαλή κοπής επάνω στη
συσκευή και ασφαλίστε περιστρέφοντας την κεφαλή κοπής ώστε να
συμπίπτουν οι δυο ενδείξεις (
I & 0
) (Εικ. 4).
Χρήση τη κυκλική κεφαλή κοπή για τα αυτιά και τη
ύτη
Εισάγετε προσεκτικά την κυκλική κεφαλή κοπής μέσα στο ρουθούνι
ή στο πτερύγιο του αυτιού και πραγματοποιήστε απαλές κινήσεις
μπρος-πίσω.
Χρήση τη κεφαλή κοπή ακριβεία για τα φρύδια
Τοποθέτηση του οδηγού κοπής
Προτού τοποθετήσετε τον οδηγό κοπής επάνω στην κεφαλή
ακριβείας για τα φρύδια, βεβαιωθείτε ότι η συσκευή είναι σβησμένη.
- Για ένα ύψος κοπής 3 mm, πιέστε πάνω στην κεφαλή της μηχανής.
- Για ένα ύψος κοπής 5 mm, πιέστε πάνω στην κεφαλή της μηχανής.
Εξαρτήματα οδηγού κοπής
Εφαρμόστε τον οδηγό κοπής στην κεφαλή κοπής ακριβείας (Σχ. 5) και
κρατήστε τη μηχανή σε όρθια θέση. Οδηγήστε την άκρη της λεπίδας
κατευθείαν μέσα στα φρύδια για να τα τριμάρετε.
2. Περιλαμβάνονται οδηγοί κοπής (3 mm, 5 mm) για διαφορετικό
ύψος κοπής.
Συμβουλές χρήσης
Για πιο λεπτά φρύδια, ξεκινήστε από το εσωτερικό άκρο του φρυδιού
και φιλάρετε με σταθερές κινήσεις προς τα έξω. Χρησιμοποιήστε
το ύψος κοπής 5 mm στο ξεκίνημα και για να εξοικειωθείτε με τη
συσκευή. Πάντα να κόβετε και να ξυρίζετε προς την κατεύθυνση
της τρίχας χωρίς να πιέζετε τη λεπίδα, γεγονός που θα μπορούσε να
προξενήσει ζημιά ή τραυματισμό. Με το ελεύθερό σας χέρι τεντώστε
το δέρμα ώστε να εξασφαλίσετε ένα βαθύ ξύρισμα.
ΣΥΝΤΗΡΗΣΗ
1. Βεβαιωθείτε ότι η συσκευή είναι απενεργοποιημένη (OFF). Για να
αφαιρέσετε την κεφαλή κοπής για καθαρισμό, περιστρέψτε την
κεφαλή αριστερόστροφα, έως ότου η ένδειξη «Ι» να ευθυγραμμιστεί
με την ένδειξη του βέλους. Έπειτα, σηκώστε ελαφρώς την κεφαλή.
2. Ξεπλύνετε μόνο την κεφαλή κάτω από τρεχούμενο νερό. Για την
σωστή λειτουργία της συσκευής, η λαβή δεν πρέπει να έρθει σε
επαφή ή να βυθιστεί σε νερό (Σχ. 6).
3. Αφού την καθαρίσετε, βεβαιωθείτε ότι αποτινάξατε όλο το νερό
από την κεφαλή, πριν την εφαρμόσετε ξανά στο σώμα της μηχανής.
4. Για να τοποθετήσετε ξανά την κεφαλή στο σώμα της μηχανής,
ευθυγραμμίστε την ένδειξη «Ι» στην κεφαλή με το εικονίδιο του
βέλους στο σώμα και, στη συνέχεια, περιστρέψτε δεξιόστροφα,
έως ότου η ένδειξη «Ι» να ευθυγραμμιστεί με την κυκλική ένδειξη
στον κορμό της μηχανής.
TRYMER DO NOSA/USZU/BRWI
Przed rozpoczęciem korzystania z urządzenia należy
zapoznać się z instrukcjami bezpieczeństwa.
Trymer BaByliss szybko i bezpiecznie usuwa niechciane lub
nieestetyczne włosy z nosa, brwi i uszu.
DANE TECHNICZNE
• Wymienna głowica tnąca do uszu i nosa.
• Precyzyjna głowica tnąca do brwi
• Nakładka do przycinania brwi z zastosowaniem dwóch
wysokości cięcia; 3 i 5 mm.
URUCHOMIENIE URZĄDZENIA
1. Aby włożyć baterie odkręć dolną część urządzenia (rys.
1).
2. Włóż baterie alkaliczne AA biegunem dodatnim w dół.
(Jeśli urządzenie nie jest używane przez dłuższy czas lub
gdy bateria jest bliska rozładowania, należy usunąć ją z
urządzenia. To pomoże wydłużyć jej czas działania.)
3. Po włożeniu baterii należy ustawić strzałkę tak, aby
zachodziła na rowek na pokrywie baterii. Następnie
przekręcić ją w prawo, aby zachodziła na okrąg.(Rys. 2)
4. Włączyć urządzenie przekręcając pokrywę baterii
w prawo tak, aby symbol „I” zachodził na rowek na
pokrywie baterii. (Rys. 2)
5. Po użyciu wyłączyć urządzenie przekręcając pokrywę
baterii tak, aby rowek na pokrywie zachodził na symbol
„O”. (Rys. 2)
Zakładanie oraz zdejmowanie głowic tnących
Upewnij się, że urządzenie jest wyłączone.
- Zdejmij głowicę tnącą urządzenia obracając ją w celu
dopasowania znaku (I) ze znakiem
IMPORTANT SAFETY
INSTRUCTIONS
READ ALL INSTRUCTIONS
BEFORE USING
FOR HOUSEHOLD
USE ONLY
KEEP AWAY FROM WATER
WARNING
1. Use close supervision when the appliance is
used by, on, or near children or individuals with
certain disabilities.
2. Use appliance only for its intended use as
described in this manual. Use only attachments
recommended by the manufacturer.
3. Never operate the appliance if it is not work-
ing properly, or has been dropped or damaged.
If appliance has fallen into water, do not
reach for it. Drain the water, let the unit dry, be
sure unit is off and then replace the battery.
4. Do not use the appliance with teeth missing
from the blades, as injury may result. Before
each use, make certain the blades are aligned
properly and oiled.
SAVE THESE
INSTRUCTIONS
TROUBLESHOOTING
There are several things to look for if your
trimmer fails to operate:
1. Be sure the trimmer is turned on.
2. Make sure that the battery is properly placed
in the battery compartment. Test the battery to
be sure it is working.
3. Check the blades to see if they are clogged
with hair clippings; if so, use a cleaning brush
to remove hair.
OPERATING
INSTRUCTIONS
1. To insert battery, remove compartment cover
by turning bottom piece of trimmer to the left,
then pulling straight down (Fig. 1).
2. Insert a AA battery, positive terminal
downward. (If you are not going to use the
device for long periods of time or if the battery
is dead, remove the battery from the device.
This will increase the battery's life.)
3. After inserting the battery, align the arrow
with the notch on battery cover and turn to the
right to align with the circle (Fig. 2).
*Do not use in the shower. To clean, simply
rinse trimmer blade under faucet.
4. Always purchase the correct size and grade
of battery most suitable for the intended use.
5. Clean the battery contacts and also those of
the device prior to battery installation.
6. Ensure the battery is installed correctly with
regard to polarity (+ and -).
7. Store unused batteries in their original
packaging, away from metal objects that could
short-circuit them. Never short-circuit batteries.
8. Never dispose of battery in fire, except under
conditions of controlled incineration. Failure
to observe this precaution may result in an
explosion. Never attempt to recharge primary
battery, as this may cause leakage, fire,
or explosion.
9. This appliance is not a toy. Keep away
from children.
GETTING STARTED
NOSE/EAR HAIR TRIMMER
Using the special circular cutting head for nose
and ears, gently insert the cutting head into the
nostril or ear and move it slightly back and forth
to cut the hair.
NOTE: To trim nose hair, insert trimmer at entry
of nostrils and start trimming the lower hairs
until no longer visible.
To trim ear hair, guide the trimmer around the
outer surface of the ear.
TO SWITCH TRIMMER HEADS
Check that the device is turned off.
• Remove the trimming head of the device by
turning it to line-up mark (
) with mark ( ).
Next, pull the head of the device upward (Fig. 3).
• Gently place the desired cutting head on the
device, then lock by turning the cutting head so
that the two marks line up (
and ) (Fig. 4).
DETAIL TRIMMER AND ATTACHMENTS
Use detail trimmer for sideburns, beard and
mustache, eyebrows, and all detail trimming:
Mustache
Attach detail trimmer and hold trimmer in an
upright position. Bring the tip of the blade
straight into the mustache to trim.
Neckline & Sideburns Attach detail trimmer
and hold the trimmer blade against the skin
at the length desired and move the trimmer
downward.
Comb Attachments
Attach comb to detail trimmer
(Fig. 5) and hold trimmer in
an upright position. Bring
the tip of the blade straight
into the mustache to trim.
2 combs (3 mm, 5 mm) are
included for a variety of
cutting lengths.
TAKING CARE OF YOUR TRIMMER
BLADE CARE
1. Brush away any loose hair that collects in
the blades.
2. Store trimmer in a safe location.
CLEANING TRIMMER
1. Make sure trimmer is OFF. To remove the
trimmer head for cleaning, turn the head
counterclockwise until the “I” mark aligns with
the arrow mark, then lift the head gently.
2. Rinse the head only under water. For proper
functioning of the unit, the handle cannot touch
or be immersed in water (Fig. 6).
3. After cleaning, make sure to shake the head
dry before reattaching it to the body.
4. To reattach the head onto the body, align the
“I” mark on the head with the arrow mark on
the body and then turn clockwise until the “I”
aligns with the circle mark on the body.
Fig.6
Fig. 3
Fig. 1 Fig. 2
Fig. 4
Fig. 5
bsnt1_19pl062448_ib_final 7-9-19.indd 1 7/9/2019 9:50 AM
. Następnie
pociągnij głowicę do góry (rys. 3)
- Ostrożnie umieść żądaną głowicę tnącą na urządzeniu,
a następnie zablokuj ją ,obracając głowicę tak, aby dwa
znaki (I & 0) pokrywały się (rys. 4).
Przycinanie za pomocą specjalnej głowicy tnącej do
nosa i uszu
Delikatnie włóż okrągłą głowicę tnącą do nozdrza lub ucha
i wykonuj delikatne ruchy w przód i w tył.
Korzystanie ze specjalnej głowicy do precyzyjnego
cięcia brwi
Mocowanie nakładki
Przed zamocowaniem nakładki do przycinania brwi,
upewnij się, że urządzenie jest wyłączone.
- Aby ustawić wysokość cięcia na 3 mm, należy przesunąć
nakładkę.
- Aby ustawić wysokość cięcia na 5 mm, należy przesunąć
nakładkę.
Użycie nakładek grzebieniowych
Nałożyć nakładkę grzebieniową na trymer (Rys. 5) i trzymać
go w pozycji pionowej. Przyłożyć końcówkę ostrza do brwi,
aby je podciąć.
W zestawie znajdują się 2 nakładki grzebieniowe (3 mm, 5
mm) dla różnych długości cięcia.
Sposób użycia
Aby zwęzić obrys brwi, należy je przycinać począwszy
od wewnętrznej krawędzi brwi i przemieszczać się
regularnymi ruchami na zewnątrz. Na początku radzimy
używać wysokości 5 mm, by nabrać wprawy w pracy
z urządzeniem. Tnij/gól zawsze zgodnie z kierunkiem
wzrostu włosów, nie naciskając na ostrze, gdyż mogłyby to
je uszkodzić lub spowodować obrażenia. Naciągnij skórę
wolną ręką, aby umożliwić dokładniejsze golenie.
KONSERWACJA
1. Ustawić urządzenie w pozycji “OFF” (“WYŁ.”). Wyjąć
głowicę urządzenia, przekręcając ją w lewo, aby symbol
(I) zachodził na strzałkę. Następnie delikatnie unieść
głowicę do góry.
2. Pod bieżącą wodą przepłukać tylko głowicę urządzenia.
Aby zapewnić jego prawidłowe działanie, nie należy
dopuścić do kontaktu z wodą uchwytu urządzenia.(Rys.
6)
3. Przed ponownym umieszczeniem głowicy na urządzeniu
należy upewnić się, że jest ona całkowicie sucha.
4. Aby ponownie przymocować głowicę, należy ustawić ją
tak, aby symbol (I) na głowicy zachodził na strzałkę na
trzonie urządzenia. Następnie przekręcić ją w prawo, aby
symbol (I) zachodził na znak okręgu na trzonie trymera.
,
Перед использованием прибора следует внимательно прочесть
правила безопасности!
При помощи триммера BaByliss можно быстро и безопасно
удалить нежелательные и неэстетичные волосы в ушах и носу или
подровнять брови.
• Специальная съемная роторная насадка для стрижки волос в носу
и ушах.
• Специальная съемная точная насадка для стрижки бровей.
• Направляющая для двух длин стрижки бровей: 3 и 5 мм.
1. Чтобы вставить батарейку, открутите нижнюю часть прибора
(Рис.1).
2. 2. Вставьте алкалиновую батарейку AA положительным полюсом
вниз. (Выньте батарейку, если она разряжена или если вы редко
пользуетесь прибором. Это поможет продлить срок работы
батареек.
3. Вставив батарейку в прибор, совместите стрелку с выемкой на
крышке батарейки и поверните вправо таким образом, чтобы
стрелка совместилась с кружочком, как показано на рисунке
(Fig.2)
4. Включите прибор, повернув крышку батарейного отсека вправо;
прибор начнет работать, когда метка «I» совместится с выемкой
на крышке батарейного отсека, как показано на рисунке (Fig.2) .
5. Закончив пользоваться прибором, отключите питание, совместив
выемку на крышке батарейного отсека с кружочком, как показано
на рисунке (Fig.2).
Убедитесь в том, что прибор выключен.
- Снимите насадку с прибора, поворачивая ее и совместив отметку
(I) с отметкой
IMPORTANT SAFETY
INSTRUCTIONS
READ ALL INSTRUCTIONS
BEFORE USING
FOR HOUSEHOLD
USE ONLY
KEEP AWAY FROM WATER
WARNING
1. Use close supervision when the appliance is
used by, on, or near children or individuals with
certain disabilities.
2. Use appliance only for its intended use as
described in this manual. Use only attachments
recommended by the manufacturer.
3. Never operate the appliance if it is not work-
ing properly, or has been dropped or damaged.
If appliance has fallen into water, do not
reach for it. Drain the water, let the unit dry, be
sure unit is off and then replace the battery.
4. Do not use the appliance with teeth missing
from the blades, as injury may result. Before
each use, make certain the blades are aligned
properly and oiled.
SAVE THESE
INSTRUCTIONS
TROUBLESHOOTING
There are several things to look for if your
trimmer fails to operate:
1. Be sure the trimmer is turned on.
2. Make sure that the battery is properly placed
in the battery compartment. Test the battery to
be sure it is working.
3. Check the blades to see if they are clogged
with hair clippings; if so, use a cleaning brush
to remove hair.
OPERATING
INSTRUCTIONS
1. To insert battery, remove compartment cover
by turning bottom piece of trimmer to the left,
then pulling straight down (Fig. 1).
2. Insert a AA battery, positive terminal
downward. (If you are not going to use the
device for long periods of time or if the battery
is dead, remove the battery from the device.
This will increase the battery's life.)
3. After inserting the battery, align the arrow
with the notch on battery cover and turn to the
right to align with the circle (Fig. 2).
*Do not use in the shower. To clean, simply
rinse trimmer blade under faucet.
4. Always purchase the correct size and grade
of battery most suitable for the intended use.
5. Clean the battery contacts and also those of
the device prior to battery installation.
6. Ensure the battery is installed correctly with
regard to polarity (+ and -).
7. Store unused batteries in their original
packaging, away from metal objects that could
short-circuit them. Never short-circuit batteries.
8. Never dispose of battery in fire, except under
conditions of controlled incineration. Failure
to observe this precaution may result in an
explosion. Never attempt to recharge primary
battery, as this may cause leakage, fire,
or explosion.
9. This appliance is not a toy. Keep away
from children.
GETTING STARTED
NOSE/EAR HAIR TRIMMER
Using the special circular cutting head for nose
and ears, gently insert the cutting head into the
nostril or ear and move it slightly back and forth
to cut the hair.
NOTE: To trim nose hair, insert trimmer at entry
of nostrils and start trimming the lower hairs
until no longer visible.
To trim ear hair, guide the trimmer around the
outer surface of the ear.
TO SWITCH TRIMMER HEADS
Check that the device is turned off.
• Remove the trimming head of the device by
turning it to line-up mark (
) with mark ( ).
Next, pull the head of the device upward (Fig. 3).
• Gently place the desired cutting head on the
device, then lock by turning the cutting head so
that the two marks line up (
and ) (Fig. 4).
DETAIL TRIMMER AND ATTACHMENTS
Use detail trimmer for sideburns, beard and
mustache, eyebrows, and all detail trimming:
Mustache
Attach detail trimmer and hold trimmer in an
upright position. Bring the tip of the blade
straight into the mustache to trim.
Neckline & Sideburns Attach detail trimmer
and hold the trimmer blade against the skin
at the length desired and move the trimmer
downward.
Comb Attachments
Attach comb to detail trimmer
(Fig. 5) and hold trimmer in
an upright position. Bring
the tip of the blade straight
into the mustache to trim.
2 combs (3 mm, 5 mm) are
included for a variety of
cutting lengths.
TAKING CARE OF YOUR TRIMMER
BLADE CARE
1. Brush away any loose hair that collects in
the blades.
2. Store trimmer in a safe location.
CLEANING TRIMMER
1. Make sure trimmer is OFF. To remove the
trimmer head for cleaning, turn the head
counterclockwise until the “I” mark aligns with
the arrow mark, then lift the head gently.
2. Rinse the head only under water. For proper
functioning of the unit, the handle cannot touch
or be immersed in water (Fig. 6).
3. After cleaning, make sure to shake the head
dry before reattaching it to the body.
4. To reattach the head onto the body, align the
“I” mark on the head with the arrow mark on
the body and then turn clockwise until the “I”
aligns with the circle mark on the body.
Fig.6
Fig. 3
Fig. 1 Fig. 2
Fig. 4
Fig. 5
bsnt1_19pl062448_ib_final 7-9-19.indd 1 7/9/2019 9:50 AM
. Затем потяните насадку прибора вверх (Рис. 3).
- Аккуратно установите выбранную насадку на прибор, затем
защелкните ее, повернув ее и совместив две отметки (I & 0) (Рис. 4).
Аккуратно вставить насадку в ноздрю или в ушную раковину и
проделать легкие движения в одну и другую сторону.
Установка направляющей для стрижки
Прежде чем устанавливать направляющую на точную насадку для
стрижки бровей, убедитесь, что прибор выключен.
- Для длины стрижки 3мм: нажмите на головку триммера
- Для длины стрижки 3мм: нажмите на головку триммера
Гребенчатые направляющие
Установите гребенчатую направляющую на высокоточный
триммер, как показано на рисунке (Fig.5) , и удерживайте
триммер в вертикальном положении. Приблизьте край лезвия
непосредственно к бровям, чтобы подстричь их.
Для разнообразия длины стрижки в комплект поставки включены 2
гребенчатые направляющие (3 мм, 5 мм).
Советы по использованию
Чтобы подровнять брови, начните с внутренней стороны и
равномерными движениями пройдите до внешнего края брови. Для
начала выберите режим стрижки длиной 5 мм, чтобы привыкнуть к
использованию прибора. Волосы всегда необходимо стричь (брить)
по направлению их роста, не прижимая лезвие во избежание его
повреждения или нанесения травмы. Для еще более аккуратного
результата во время стрижки натягивайте кожу свободной рукой.
1. Убедитесь в том, что триммер выключен (переключатель в
положении OFF). Чтобы снять головку триммера для ухода за ней,
поверните ее против часовой стрелки до тех пор, пока метка «I» не
совместится со стрелкой, затем аккуратно снимите головку.
2. Ополосните головку триммера в воде. Для обеспечения
нормального функционирования прибора ручка триммера не
должна касаться воды или погружаться в нее (Fig.6).
3. Закончив уход за прибором, встряхните головку, чтобы удалить с
нее воду. Устанавливайте на триммер только высохшую головку.
4. Чтобы установить головку на корпус, совместите метку «I» на
головке со стрелкой на корпусе, затем поверните головку по
часовой стрелке до тех пор, пока метка «I» не совместится с
кружочком на корпусе прибора.
BURUN/KULAK/KAS TÜYLERINI KESME MAKINESI
Lütfen cihazı kullanmadan önce güvenlik talimatlarını
dikkatlice okuyun.
Bu BaByliss tüy kesme makinesi kaş, burun ve kulaklardaki
istenmeyen rahatsız edici tüyleri hızlı ve güvenli bir şekilde
kesmeyi sağlar.
ÖZELLIKLER
• Burun ve kulak tüyleri için sökülüp takılabilir özel dairesel
kesim başlığı.
• Kaşlar için sökülüp takılabilir özel hassas kesim başlığı.
• Kaşlar için 2 uzunluk ayarına sahip kesim kılavuzu: 3 ve
5 mm.
CIHAZIN ÇALISTIRILMASI
1. Pil takmak için cihazın alt kısmını çıkarın (Şek. 1).
2. Artı kutbu aşağı olacak şekilde bir AA alkalin pil takın.
(Cihaz uzun süre kullanılmıyorsa veya pil bitmişse pili
cihazdan çıkarın. Bu işlem cihazın kullanım ömrünü
uzatmaya yarayacaktır.)
3. Pili taktıktan sonra, pil kapağındaki çentikle hizalayın ve
dairelye hizalamak için sağa çevirin (Şek.2).
4. Batarya kapağını sağa doğru çevirerek cihazı açın,
cihaz “I” işareti ve batarya kapağındaki çentik üst üste
olduğında çalışmaya başlar. (Şek.2)
5. Kullandıktan sonra, pil kapağının çentiğini daireyle aynı
hizaya getirerek, cihazın güçle beslenmesini kapatın.
(Şek. 2)
Kesim balıklarının sökülüp takılması
Cihazın kapalı olduğundan emin olun.
- (I) işaretini
IMPORTANT SAFETY
INSTRUCTIONS
READ ALL INSTRUCTIONS
BEFORE USING
FOR HOUSEHOLD
USE ONLY
KEEP AWAY FROM WATER
WARNING
1. Use close supervision when the appliance is
used by, on, or near children or individuals with
certain disabilities.
2. Use appliance only for its intended use as
described in this manual. Use only attachments
recommended by the manufacturer.
3. Never operate the appliance if it is not work-
ing properly, or has been dropped or damaged.
If appliance has fallen into water, do not
reach for it. Drain the water, let the unit dry, be
sure unit is off and then replace the battery.
4. Do not use the appliance with teeth missing
from the blades, as injury may result. Before
each use, make certain the blades are aligned
properly and oiled.
SAVE THESE
INSTRUCTIONS
TROUBLESHOOTING
There are several things to look for if your
trimmer fails to operate:
1. Be sure the trimmer is turned on.
2. Make sure that the battery is properly placed
in the battery compartment. Test the battery to
be sure it is working.
3. Check the blades to see if they are clogged
with hair clippings; if so, use a cleaning brush
to remove hair.
OPERATING
INSTRUCTIONS
1. To insert battery, remove compartment cover
by turning bottom piece of trimmer to the left,
then pulling straight down (Fig. 1).
2. Insert a AA battery, positive terminal
downward. (If you are not going to use the
device for long periods of time or if the battery
is dead, remove the battery from the device.
This will increase the battery's life.)
3. After inserting the battery, align the arrow
with the notch on battery cover and turn to the
right to align with the circle (Fig. 2).
*Do not use in the shower. To clean, simply
rinse trimmer blade under faucet.
4. Always purchase the correct size and grade
of battery most suitable for the intended use.
5. Clean the battery contacts and also those of
the device prior to battery installation.
6. Ensure the battery is installed correctly with
regard to polarity (+ and -).
7. Store unused batteries in their original
packaging, away from metal objects that could
short-circuit them. Never short-circuit batteries.
8. Never dispose of battery in fire, except under
conditions of controlled incineration. Failure
to observe this precaution may result in an
explosion. Never attempt to recharge primary
battery, as this may cause leakage, fire,
or explosion.
9. This appliance is not a toy. Keep away
from children.
GETTING STARTED
NOSE/EAR HAIR TRIMMER
Using the special circular cutting head for nose
and ears, gently insert the cutting head into the
nostril or ear and move it slightly back and forth
to cut the hair.
NOTE: To trim nose hair, insert trimmer at entry
of nostrils and start trimming the lower hairs
until no longer visible.
To trim ear hair, guide the trimmer around the
outer surface of the ear.
TO SWITCH TRIMMER HEADS
Check that the device is turned off.
• Remove the trimming head of the device by
turning it to line-up mark (
) with mark ( ).
Next, pull the head of the device upward (Fig. 3).
• Gently place the desired cutting head on the
device, then lock by turning the cutting head so
that the two marks line up (
and ) (Fig. 4).
DETAIL TRIMMER AND ATTACHMENTS
Use detail trimmer for sideburns, beard and
mustache, eyebrows, and all detail trimming:
Mustache
Attach detail trimmer and hold trimmer in an
upright position. Bring the tip of the blade
straight into the mustache to trim.
Neckline & Sideburns Attach detail trimmer
and hold the trimmer blade against the skin
at the length desired and move the trimmer
downward.
Comb Attachments
Attach comb to detail trimmer
(Fig. 5) and hold trimmer in
an upright position. Bring
the tip of the blade straight
into the mustache to trim.
2 combs (3 mm, 5 mm) are
included for a variety of
cutting lengths.
TAKING CARE OF YOUR TRIMMER
BLADE CARE
1. Brush away any loose hair that collects in
the blades.
2. Store trimmer in a safe location.
CLEANING TRIMMER
1. Make sure trimmer is OFF. To remove the
trimmer head for cleaning, turn the head
counterclockwise until the “I” mark aligns with
the arrow mark, then lift the head gently.
2. Rinse the head only under water. For proper
functioning of the unit, the handle cannot touch
or be immersed in water (Fig. 6).
3. After cleaning, make sure to shake the head
dry before reattaching it to the body.
4. To reattach the head onto the body, align the
“I” mark on the head with the arrow mark on
the body and then turn clockwise until the “I”
aligns with the circle mark on the body.
Fig.6
Fig. 3
Fig. 1 Fig. 2
Fig. 4
Fig. 5
bsnt1_19pl062448_ib_final 7-9-19.indd 1 7/9/2019 9:50 AM
işareti ile aynı hizaya getirmek için cihazın
kesim başlığını döndürerek çıkarın. Ardından cihazın
başlığını yukarıya doğru çekin (Şek. 3).
- İstenilen kesim başlığını dikkatlice cihaza takın, ardından
iki işareti (I & 0) aynı hizaya getirmek için kesim başlığını
çevirerek kilitleyin (Şek. 4).
Burun ve kulak tüyleri için özel dairesel kesim
balığının kullanımı
Kesim başlığını burun deliğine veya kulak kepçesine
dikkatlice sokun ve yavaşça ileri geri hareket ettirin.
Kalar için özel hassas kesim balığının kullanımı
Kesim kılavuzunu takma
Kesim kılavuzunu kaşlara özel hassas başlığa takarken
cihazın kapalı olduğundan emin olun.
- 3 mm yüksekliğinde kesim için, düzeltici başlığını tıklayın.
- 5 mm yüksekliğinde kesim için, düzeltici başlığını tıklayın.
Tarak Ekleri
Tarağı detaylı düzelticiye takın (Şek.5) ve düzelticiyi dik
konumda tutun. Düzeltmek için bıçağın ucunu doğrudan
kaşlara doğru getirin.
2. Tarak (3mm, 5mm) çeşitli kesme uzunlukları için dahil
edilmiştir.
Kullanım tavsiyeleri
Kaşları kaşın iç kenarından başlayarak ve dışa doğru düzenli
hareketler yaparak inceltin. Cihazı ilk kez kullanmak ve
cihaza alışmak için 5 mm’lik kesim uzunluğunu kullanın.
Hasar vermemesi ve yaralanmalara neden olmaması
için tüyleri daima bıçağa bastırmadan tüylerin büyüme
yönünde kesin / tıraş edin. Daha yakın bir tıraş sağlamak
için cildi boştaki elinizle gerdirin.
BAKIM
1. Düzelticinin KAPALI olduğundan emin olun. Düzeltici
kafasını temizleme amacıyla çıkarmak için, «I» işareti
ok işaretiyle aynı hizaya gelinceye kadar başlığı saat
yönünün tersine çevirin, ardından başlığı yavaşça
kaldırın.
2. Sadece başlığı su altında durulayın. Cihazın düzgün
çalışması için tutucuyu suya değdirmemeli veya
batırılamalı (Şek.6)
3. Temizledikten sonra, gövdeye tekrar takmadan önce
başlığın kuru olduğundan emin olun.
4. Başlığı gövdeye tekrar takmak için, baştaki «I» işaretini
gövdede ok işaretiyle hizalayın ve sonra «I» ‘yi, gövde
üzerindeki daire işaretiyle aynı hizaya gelene kadar saat
yönünde çevirin.
İthalatçı Firma : Hakman Elektronik San. ve Tic. A.Ş.
Dikilitaş Mah. Emirhan Cad. No:113 Kat:5 Barbaros
Plaza İş Merkezi Beşiktaş /İstanbul
Çağrı Merkezi Numarası: 0850 255 13 43
Машинка для стрижки
Производитель: BaByliss SARL
99 Авеню Аристид Бриан
92120, Монруж, Франция
Факс 33 (0) 1 46 56 47 52
Сделано в Китае
Дата производства (неделя, год): см. на товаре

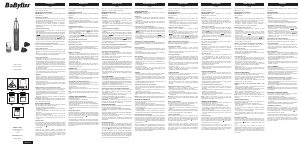
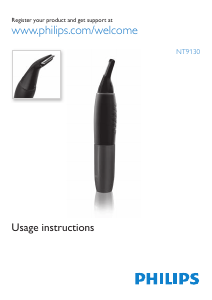
Bli med i samtalen om dette produktet
Her kan du dele hva du synes om BaByliss E110E Nesehårtrimmer. Hvis du har et spørsmål, les først bruksanvisningen nøye. Be om en bruksanvisning kan gjøres ved å bruke vårt kontaktskjema.