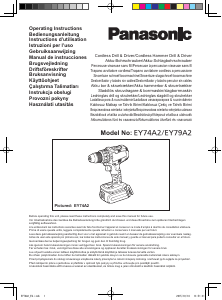
Bruksanvisning Panasonic EY6220 Drill-skrutrekker
Trenger du en bruksanvisning for Panasonic EY6220 Drill-skrutrekker? Nedenfor kan du se og laste ned PDF-bruksanvisningen gratis på norsk. Dette produktet har for øyeblikket 3 vanlige spørsmål, 1 kommentar og har 0 stemmer. Hvis dette ikke er bruksanvisningen du ønsker, vennligst kontakt oss.
Er ditt produkt defekt og finner du ikke løsningen i bruksanvisningen? Dra til en Repair Café for gratis hjelp til reparasjon.
Bruksanvisning
Loading…


Loading…
Vurdering
La oss få vite hva du syns om Panasonic EY6220 Drill-skrutrekker ved å gi en produktbedømmelse. Vil du dele dine erfaringer med dette produktet eller stille et spørsmål? Legg igjen en kommentar nederst på siden.Mer om denne håndboken
Vi forstår at det er fint å ha en papirhåndbok for Panasonic EY6220 Drill-skrutrekker. Du kan alltid laste ned bruksanvisningen fra nettsiden vår og skrive den ut selv. Hvis du vil ha en original bruksanvisning, anbefaler vi at du kontakter Panasonic. De kan kanskje gi en original bruksanvisning. Leter du etter bruksanvisningen til Panasonic EY6220 Drill-skrutrekker på et annet språk? Velg ditt foretrukne språk på hjemmesiden vår og søk etter modellnummeret for å se om vi har det tilgjengelig.
Spesifikasjoner
| Merke | Panasonic |
| Modell | EY6220 |
| Kategori | Drill-skrutrekkere |
| Filtype | |
| Filstørrelse | 1.34 MB |
Alle bruksanvisninger for Panasonic Drill-skrutrekkere
Flere håndbøker for Drill-skrutrekkere
Ofte stilte spørsmål om Panasonic EY6220 Drill-skrutrekker
Vårt supportteam søker etter nyttig produktinformasjon samt svar på ofte stilte spørsmål. Hvis du finner en feil i våre ofte stilte spørsmål, vennligst gi oss beskjed ved å benytte vårt kontaktskjema.
Jeg fortsetter å strippe skruehodet når jeg bruker boredriveren. Hvorfor det? Verifisert
De fleste boredrivere kan innstilles til å skru hardere eller mykere. Hvis hodet blir strippet, bør boredriveren sannsynligvis settes i en annen setting. Når det er en trådløs enhet, må du alltid være sikker på at batteriet er ladet for å få et optimalt resultat.
Det var nyttig (73) Les merMå jeg bruke hørselsvern når jeg bruker drill? Verifisert
Ja det burde du. Selv om støymengden som bor produserer kan variere mellom merker og modeller, kan langvarig eksponering for høy støy forårsake permanent hørselsskade. Derfor er det lurt å bruke hørselsvern.
Det var nyttig (23) Les merKan jeg lagre elektroverktøy i en bod eller garasje? Verifisert
Generelt kan du oppbevare elektroverktøy i bod eller garasje, selv om det noen ganger fryser der. Det er imidlertid bedre for levetiden til elektroverktøyet å oppbevare det på et tørt sted uten store temperatursvingninger. I en bod eller garasje kan temperaturforskjeller føre til at det dannes kondens, som kan forårsake rust. I tillegg holder verktøy som går på batterier kortere og lader ikke like godt ved svært lave temperaturer. For å være sikker på hvordan elektroverktøyet ditt må oppbevares, les alltid brukerhåndboken grundig.
Det var nyttig (8) Les mer


Bli med i samtalen om dette produktet
Her kan du dele hva du synes om Panasonic EY6220 Drill-skrutrekker. Hvis du har et spørsmål, les først bruksanvisningen nøye. Be om en bruksanvisning kan gjøres ved å bruke vårt kontaktskjema.
svar | Det var nyttig (0) (Oversatt av Google)