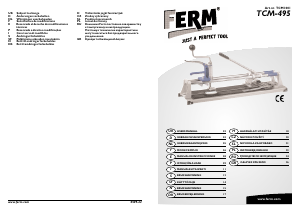
Bruksanvisning FERM TCM1001 Flisekutter

Trenger du en bruksanvisning for FERM TCM1001 Flisekutter? Nedenfor kan du se og laste ned PDF-bruksanvisningen gratis på norsk. Dette produktet har for øyeblikket 3 vanlige spørsmål, 0 kommentarer og har 0 stemmer. Hvis dette ikke er bruksanvisningen du ønsker, vennligst kontakt oss.

Er ditt produkt defekt og finner du ikke løsningen i bruksanvisningen? Dra til en Repair Café for gratis hjelp til reparasjon.

Bruksanvisning

Loading…

Caution! For your own safety, carefully read these
instructions for use before using the machine.
TECHNICAL SPECIFICATIONS
6 mm
400 mm
30 -80 mm
0-45
o
TABLE OF CONTENTS:
1. SPECIAL SAFETY INSTRUCTIONS
2. ASSEMBLY
3. HOW TO CUT AND BREAK TILES
4. MAINTENANCE
Faulty and/or discarded electrical or electronic
apparatus have to be collected at the appropriate
recycling locations.
1. SPECIAL SAFETY
INSTRUCTIONS
1. The tile cutting machine is fitted with a replaceable
circular blade. Therefore, keep children away.
2. After use the machine must be stored in a safe and
dry place, away from children.
3. This machine has been designed for cutting and
breaking glazed tiles, and must not be used for any
other purpose.
4. When using the tile cutting machine make sure to
keep extension leads and such away from the
machine.
5. Always place the tile cutting machine on a level and
firm surface.
6. CAUTION! The edges of cut tiles are sharp.
2. ASSEMBLY
Assemble the tile cutting machine as shown in the
drawing.
ASSEMBLY OF THE TILE CUTTING
MACHINE
Remove all the parts from the box and assemble the tile
cutting machine as follows:
1. Slide the black rubber feet (T) over the corners of
the tile cutter. Slide a washer onto the bolt and push
this into the rubber foot. Now slide a washer and a
nut over the bolt on the back and fasten this
properly. Repeat this for the other three corners.
2. Mount the fastening blocks (N) with the 2 tubes (M)
onto the bottom plate (V) using the 4 bolts (O) and
washers (P).
3. Screw the lever (H) onto the tube fastening (I).
4. Finally, mount the sash angle (U) onto the bottom
plate (V) using the knob (S) and washer.
ASSEMBLY OF THE HOLLOW SQUARE
CHISEL
1. Place the hollow square chisel above the hole in the
bottom plate (V).
2. Make sure that the clamping plate (E) comes under
the 2 tubes and fasten this using the socket head
wrench supplied. The socket head wrench is situated
in the black fastening plate (C).
3. It is important that the drill (G) and the knife (F) are
adjusted in such a way that they just touch the
bottom plate (V). This adjustment can be done using
the two nuts at the top of the hollow square chisel.
Then fasten these nuts against each other.
3. HOW TO CUT AND BREAK TILES
1. Use a soft-tipped (carpenter’s) pencil to mark off the
cutting line.
2. Place the tile against the stop, the glazed side facing
upward. The pencil mark must be directly below the
blade.
3. Firmly hold the tile and cut several times (at least 4)
along the mark. After each cut, press the lever more
firmly.
4. Lift the lever when it has reached the front edge of
the tile and moved it backward.
5. Subsequently the break-off unit is lifted. Repeat along
the full width of the tile until the notch is sufficiently
deep.
The cutting movement results from moving the
lever from the back edge of the tile towards its
front, while lightly pressing the lever.
WALL TILES
(single baked)
Lift the lever and position the break-off unit in the middle
of the tile. Press the lever down and the tile will break.
FLOOR TILES
(double-baked):
Sometimes these much harder tiles cannot be cut in two
by means of the break-off unit (K) on the tile cutting
machine.
In these cases after making the notch the tile must be
broken in two by tapping the underside of the tile with a
light hammer along the full length of the notch. This way
the break line will spread through the tile, and cause the
tile to break in two along the line. By means of the wing
nut (Q) the angle of the stop can be adjusted.
MAKING HOLES BY MEANS OF THE (HAND)
DRILL
1. Mount the drill attachment including the drill over
the centre of the hole in the base. It is important that
2 Ferm
Ferm 31
EXPLODED VIEW
SPARE PARTS LIST TCM-495
REF NR DESCRIPTION FERM NR
- SPARE CUTTING WHEEL TCA1001
A ELEVATING ARM 207809
E CLAMPING PLATE 207813
F CUTTER 207803
G CUTTER BRACKET 207802
I PIPE FIXTURE FOR LEVER 207807
K BREAKING HEAD 207805
Q WING NUT WITH WASHER 207819
R ANGLE INDICATOR 207820
WVU
T
S
N
P
O
L
I
H
C
B
A
D
M
E
F
K
G
Z
J
QR
Last ned bruksanvisning på norsk (PDF, 0.6 MB)
(Tenk på miljøet og bare skriv ut denne bruksanvisningen hvis det virkelig er nødvendig)

Loading…

Vurdering

La oss få vite hva du syns om FERM TCM1001 Flisekutter ved å gi en produktbedømmelse. Vil du dele dine erfaringer med dette produktet eller stille et spørsmål? Legg igjen en kommentar nederst på siden.
Er du fornøyd med FERM TCM1001 Flisekutter?
Ja Nei
Vær den første til å bedømme dette produktet
0 stemmer

Bli med i samtalen om dette produktet

Her kan du dele hva du synes om FERM TCM1001 Flisekutter. Hvis du har et spørsmål, les først bruksanvisningen nøye. Be om en bruksanvisning kan gjøres ved å bruke vårt kontaktskjema.

Mer om denne håndboken

Vi forstår at det er fint å ha en papirhåndbok for FERM TCM1001 Flisekutter. Du kan alltid laste ned bruksanvisningen fra nettsiden vår og skrive den ut selv. Hvis du vil ha en original bruksanvisning, anbefaler vi at du kontakter FERM. De kan kanskje gi en original bruksanvisning. Leter du etter bruksanvisningen til FERM TCM1001 Flisekutter på et annet språk? Velg ditt foretrukne språk på hjemmesiden vår og søk etter modellnummeret for å se om vi har det tilgjengelig.

Spesifikasjoner

Merke FERM
Modell TCM1001
Kategori Flisekutter
Filtype PDF
Filstørrelse 0.6 MB

Alle bruksanvisninger for FERM Flisekutter
Flere håndbøker for Flisekutter

Ofte stilte spørsmål om FERM TCM1001 Flisekutter

Vårt supportteam søker etter nyttig produktinformasjon samt svar på ofte stilte spørsmål. Hvis du finner en feil i våre ofte stilte spørsmål, vennligst gi oss beskjed ved å benytte vårt kontaktskjema.

Hva er forskjellen mellom keramiske fliser og porselenfliser? Verifisert

Begge er laget av leire, men porselenfliser har høyere tetthet. Dette gjør porselensfliser sterkere og mer holdbare, men også vanskeligere å kutte. Du trenger spesialiserte verktøy og ferdigheter for å få det samme resultatet som med keramiske fliser.

Det var nyttig (13) Les mer

Hvordan kan jeg forhindre at flisene mine fliser mens jeg skjærer dem? Verifisert

Du kan bruke maskeringstape over toppen av flisen før du kutter for å redusere flis.

Det var nyttig (13) Les mer

Spiller det noen rolle hvilken side av flisen jeg kutter? Verifisert

Ja, uansett hvilken flis du skjærer, er det best å kutte med fronten av flisen oppover. Dette vil sikre den jevneste overflaten og minimere risikoen for flis.

Det var nyttig (10) Les mer
Bruksanvisning FERM TCM1001 Flisekutter

Relaterte produkter

Relaterte kategorier