© 2017 BRIO AB/3834-896 E
© 2017 BRIO AB/3834-896 E
BRIO AB, Box 305, SE-201 23 Malmö, Sweden. Tel: +46 40 619 40 00.
BRIO AB, Box 305, SE-201 23 Malmö, Sweden. Tel: +46 40 619 40 00.
DE FR ES PT ITEN
SK
Important:
• Only adults should install and replace batteries.
• Different types of batteries or new and used batteries are not to be mixed.
• Only recommended batteries of the same or equivalent type as
recommended (1.5V) are to be used.
• Batteries are to be inserted with the correct polarity.
• Exhausted batteries are to be removed from the toy.
• The supply terminals are not to be short-circuited.
• Always remove batteries if the toy is not to be used for some time.
• Protect the toy from water or dampness.
• Do not attempt to recharge non-rechargeable batteries..
• Rechargeable batteries are to be removed from the toy before being charged.
• Rechargeable batteries are only to be charged under adult supervision.
• Used batteries and electrical components must be disposed of at an approved collection point.
• Electrical components or batteries must not be thrown with household waste.
Please retain for future reference!
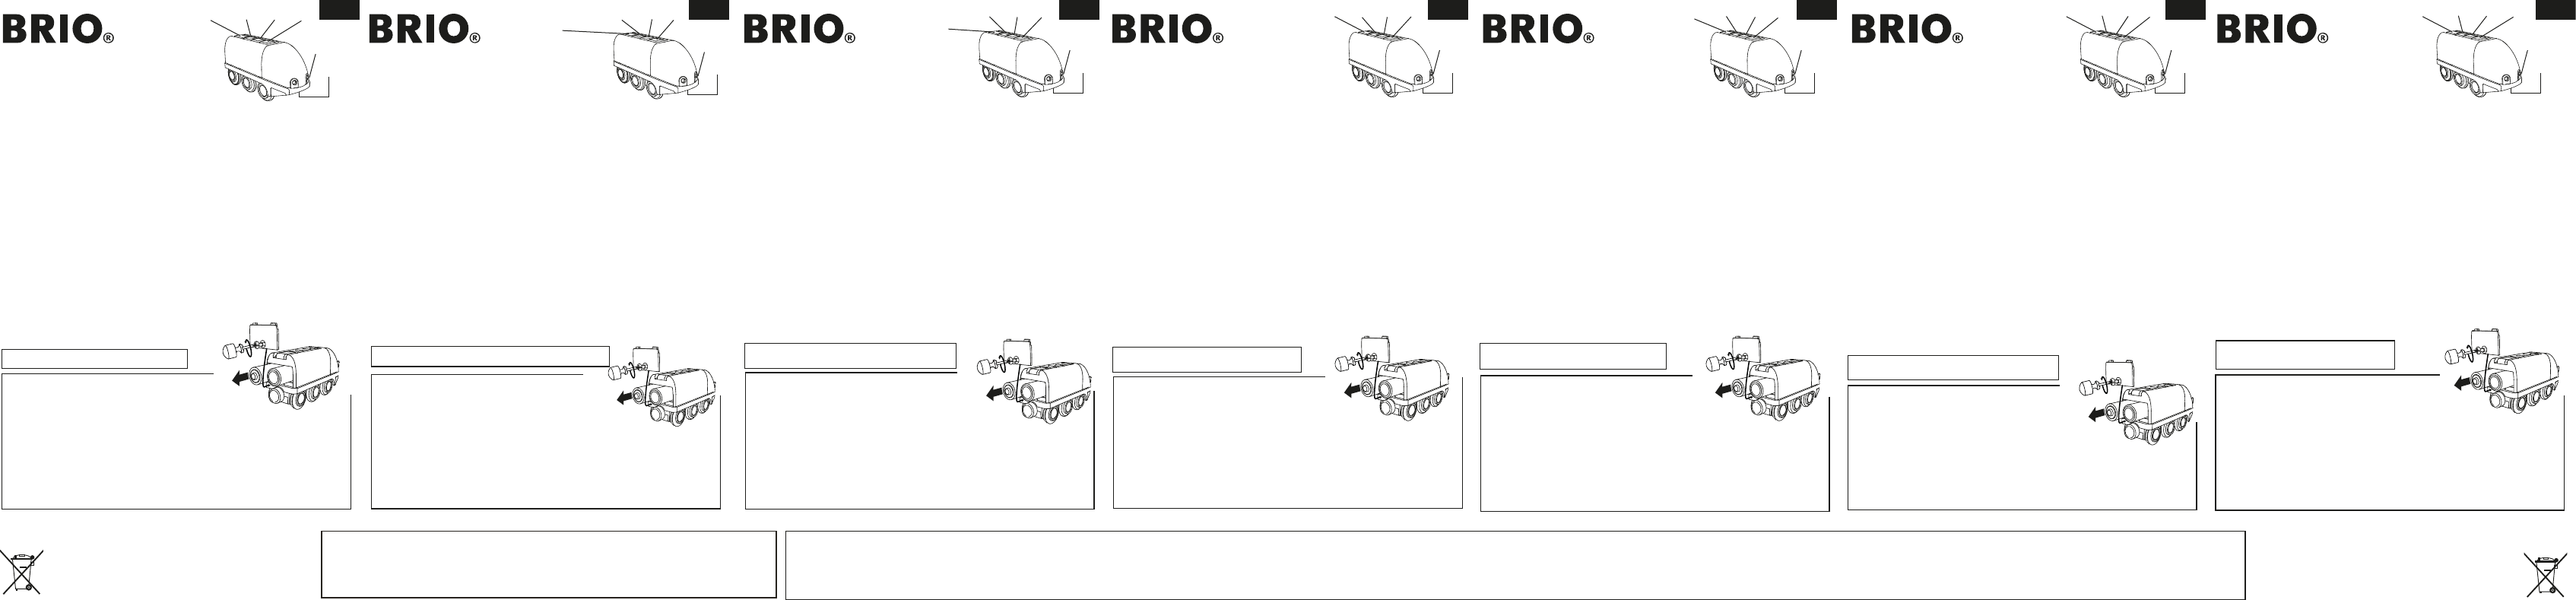
To get started:
Turn on the Smart Tech Engine by switching to ‘ON’ position
on the bottom of the engine. Next, on the top of engine,
press ‘forward’ or ‘back’ button to activate electronic functions.
How Smart Tech works:
• The Smart Tech Engine acts as the center of all ‘Smart’ activities. The Engine sends and receives signals
from the play elements and transfers them into a series of unique actions, sounds and light effects.
• The Smart Tech Engine can also be used without ‘Smart‘ tunnels or stations by using the buttons
on the top of the engine to control it.
• The Smart Tech Engine will automatically shut down after 5 minutes of inactivity.
• Other units with RFID (Radio Frequency Identity) can interfere with Smart Tech products. Avoid
placing, for instance, credit cards close by. Should that happen, move the Engine away from the
disturbance and turn it ‘OFF’ and then ‘ON’ again to reactivate it.
• If the wheels spin and seem like they have too loose of a grip on the tracks, make sure that the tracks
and wheels are free from dust. Wipe with a damp cloth.
• If the Smart Tech Engine derails, make sure the tracks are on a flat surface and are correctly connected.
• The backlight on the engine will light up in red when it is time to change the batteries.
• Note! The engine needs to be driving in the forward direction when driving up an ascending track.
The Smart Tech Engine together with other Smart Tech products:
• For best function, make sure that the Smart Tech tunnel or station is standing still on a flat surface.
• Note! Some Smart Tech products can slow the engine down, so avoid putting an ascending track
right after a Smart Tech tunnel or station.
• If the Smart Tech Engine does not respond to the Smart Tech tunnel or station, make sure that it
sits on a flat surface. Otherwise, try to replace the batteries.
Note! If the Smart Tech Engine freezes in a position or does not react correctly, try resetting by
pressing any button on the engine.
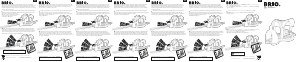
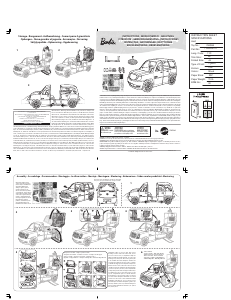
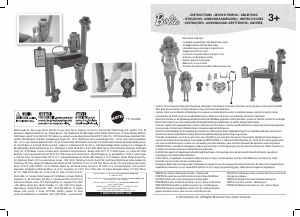
Replacing batteries: The Smart Tech Engine is powered by 2 x 1.5V AA batteries. Use a screwdriver to
open the battery cover (see illustration). Install the batteries as shown (+/–). Close the battery cover and
tighten the screw. Turn on the Smart Tech Engine by switching to ‘ON’
position on the bottom of the engine. Press one of the buttons on the
top of the engine to activate it.
Stop
Red ashing light when
driving backwards.
A steady red light
indicates low battery
Front lights
ON/OFF
ForwardBack
Wichtig:
• Die Batterien sollten nur von Erwachsenen eingesetzt
und ausgewechselt werden.
• Unterschiedliche Batterietypen oder neue und bereits benutzte Batterien
sollten nicht zusammen verwendet werden.
• Nur empfohlene Batterien desselben Typs oder einen gleichwertigen Typ wie
empfohlen (1.5V) verwenden.
• Batterien den Polaritätsangaben im Batteriefach entsprechend einlegen.
• Verbrauchte Batterien aus dem Spielzeug entfernen.
• Die Versorgungsklemmen dürfen nicht kurzgeschlossen werden.
• Die Batterien grundsätzlich entfernen, wenn das Spielzeug längere Zeit nicht benutzt wird.
• Das Spielzeug vor Wasser und Feuchtigkeit schützen.
• Nicht versuchen nicht wiederaufladbare Batterien aufzuladen.
• Aufladbare Batterien vor dem Aufladen aus dem Spielzeug entfernen.
• Aufladbare Batterien nur unter Aufsicht eines Erwachsenen aufladen.
• Verbrauchte Batterien und elektrische Bauteile müssen an einer genehmigten Sammelstelle entsorgt werden.
• Elektrische Bauteile oder Batterien dürfen nicht zusammen mit Haushaltsabfällen entsorgt werden.
Bitte für späteres Nachschlagen aufbewahren.
Erste Schritte:
Die Smart Tech-Lokomotive einschalten, indem Sie den Schalter auf der
Unterseite der Lok auf „EIN“ schalten. Anschließend oben auf der Lok den
Knopf „vorwärts“ oder „zurück“ drücken, um die elektrischen Funktionen zu aktivieren.
So funktioniert Smart Tech:
• Die Smart Tech Lok ist das Zentrum aller „Smart“-Aktivitäten. Die Lok sendet und empfängt Signale von den
Spielelementen und überträgt sie auf eine Reihe von einzigartigen Aktivitäten, Tönen und Lichteffekten.
• Die Smart Tech-Lok kann auch ohne „Smart“-Tunnel oder Bahnhöfe verwendet werden.
Zu diesem Zweck betätigt man die Knöpfe oben auf der Lok, um sie zu kontrollieren.
• Die Smart Tech-Lok schaltet sich nach 5 Minuten Inaktivität automatisch aus.
• Andere Einheiten mit RFID (Identifizierung mit Hilfe elektromagnetischer Wellen) können die Smart Tech.
Produkte beeinträchtigen. Es sollten beispielsweise möglichst keine Kreditkarten in ihre Nähe gelegt werden.
Sollte dies vorkommen, entfernen Sie die Lok aus der Nähe der Störquelle und schalten sie „AUS“ und wieder
„EIN“, um sie zu reaktivieren.
• Wenn die Räder sich drehen und es den Anschein hat, dass sie den Halt auf den Schienen verloren haben,
sollten Sie sicherstellen, dass die Schienen und Räder staubfrei sind. Mit einem feuchten Tuch abwischen.
• Wenn die Smart Tech-Lok entgleist, sollten Sie sicherstellen, dass die Schienen auf einer ebenen
Fläche stehen und richtig verbunden sind.
• Die Hintergrundbeleuchtung des Motors leuchtet rot, wenn es an der Zeit ist, die Batterien zu wechseln.
• Hinweis! Um eine Steigung zu überwinden, muss die Lok vorwärts fahren.
Die Smart Tech-Lok zusammen mit anderen Smart Tech Produkten:
• Um eine optimale Funktion zu gewährleisten, sollten Sie sicherstellen, dass der Smart Tech-Tunnel bzw.
der Bahnhof still auf einer ebenen Oberfläche steht.
• Hinweis! Einige Smart Tech-Produkte können die Lok verlangsamen. Vermeiden Sie es es, ansteigende
Schienen direkt hinter einen Smart Tech-Tunnel oder -Bahnhof zu stellen.
• Wenn die Smart Tech Lok nicht auf den Smart Tech-Tunnel bzw. den Bahnhof reagiert, sollten Sie sicherstellen,
dass dieser auf einer ebenen Oberfläche steht. Versuchen Sie ansonsten, die Batterien zu wechseln.
Achtung! Wenn die Smart Tech Lok in einer Position stehen bleibt oder nicht ordnungsgemäß reagiert, versuche
sie zurückzusetzen, indem du eine beliebige Taste an der Lok drückst.
Batteriewechsel: Die Smart Tech-Lok benötigt 2 x 1.5 V AA-Batterien. Nutzen Sie zum Öffnen der Batterie-
abdeckung einen Schraubenzieher (siehe Abbildung). Legen Sie die Batterie wie beschrieben ein (+/-).
Schließen Sie die Abdeckung und ziehen Sie die Schraube fest. Die Smart Tech-Lok
einschalten, indem Sie den Schalter auf der Unterseite der Lok auf „EIN“ schalten.
Einen der Knöpfe oben auf der Lok drücken, um die Lok zu aktivieren.
Anhalten
Das rote Licht blinkt, wenn
man rückwärtsfährt. Bei
niedriger Batterie
erscheint ein rotes
Dauerlicht.
Vorderlicht
ON/OFF
Starten
Rückwärts fahren
Important :
• L’installation et le remplacement des piles doivent uniquement
être effectués par des adultes.
• N’associez pas différents types de piles ou des piles nouvelles avec des piles
usagées.
• Utilisez seulement les piles recommandées ou de type équivalent (1,5 V).
• Insérez les piles dans le bon sens de leur polarité.
• Retirez les piles usagées du jouet.
• Les terminaux d’alimentation ne doivent pas être court-circuités.
• Retirez toujours les piles si le jouet n’est pas utilisé pendant une longue période.
• Protégez le jouet de l’eau et de l’humidité.
• N’essayez pas de recharger des piles non rechargeables.
• Les piles rechargeables doivent être retirées du jouet avant d’être chargées.
• Les piles rechargeables doivent uniquement être rechargées avec l’aide d’un adulte.
• Les piles usagées et les composants électriques doivent être éliminés dans un lieu de collecte de déchets
adéquat.
• Les composants électriques ou les piles ne doivent pas être éliminés avec des déchets ménagers.
Veuillez conserver cette notice pour pouvoir la consulter ultérieurement.
Pour démarrer : Activez la locomotive Smart Tech en mettant le bouton
à la position « ON » sur le dessous de la locomotive. Ensuite, sur le dessus
de la locomotive, appuyez sur le bouton « forward » (« avance ») ou
« back » (« recul ») pour activer les fonctions électroniques.
Comment Smart Tech fonctionne :
• La locomotive Smart Tech centralise toutes les activités « Smart ». La locomotive envoie et reçoit des signaux
depuis des éléments du jeu et les convertit en toute une série unique d’actions et d’effets sonores et lumineux.
• La locomotive Smart Tech peut également être utilisée sans tunnels ou stations « Smart » en utilisant les boutons
qui se trouvent sur le dessus de la locomotive pour la contrôler.
• La locomotive Smart Tech va automatiquement se fermer au bout de 5 minutes d’inactivité.
• D’autres unités avec RFID (Radio Frequency Identity - Identification par radiofréquence) peuvent interférer avec
les produits Smart Tech. Évitez de placer, par exemple, des cartes de crédit à proximité. Si cela se passe, écartez
la locomotive de la perturbation et désactivez-la au moyen du bouton « OFF » puis utilisez le bouton « ON » à
nouveau pour la réactiver.
• Si les roues paraissent dérailler lorsqu’elles tournent, retirez la poussière présente sur les rails et les roues. Essuyez
avec un chiffon humide.
• Si la locomotive Smart Tech Engine déraille, assurez-vous que les rails sont posés sur une surface plate et qu’ils
sont correctement raccordés.
• L'éclairage de fond sur le moteur passe au rouge quand il est nécessaire de remplacer les batteries.
• Remarque : La locomotive doit être en marche avant lorsqu'elle est sur des rails ascendants.
La locomotive Smart Tech fonctionne avec d’autres produits Smart Tech:
• Pour un meilleur fonctionnement, faites en sorte que le tunnel ou la station Smart Tech soient placés en position
stable et sur une surface plate.
• Notez bien ! Certains produits Smart Tech peuvent réduire la vitesse de la locomotive, alors évitez de placer un
tronçon de voie juste après un tunnel ou une station Smart Tech.
• Si la locomotive Smart Tech ne répond pas au tunnel ou à la station Smart Tech, assurez-vous qu’elle se trouve
sur une surface plate. Autrement, essayez de remplacer les piles.
NB: Si le moteur Smart Tech s'immobilise dans une position ou ne réagit pas correctement, essayez de le
réinitialiser en appuyant sur n'importe quel bouton.
Remplacement des piles : La locomotive Smart Tech est alimentée par des piles 2 x 1.5V AA. Ouvrez le couvercle
des piles à l'aide d'un tournevis (voir l’illustration). Insérez les piles comme indiqué (+/-). Fermez le couvercle du
compartiment à piles et serrez la vis. Activez la locomotive Smart Tech en mettant le bouton en position « ON » sur
le dessous de la locomotive. Appuyez sur l’un des boutons sur le dessus de la locomotive pour l’activer.
Arrêt
Une lumière rouge clignote
pendant la marche arrière.
Une lumière rouge xe
indique que le niveau de la
batterie est faible.
Feux avant
ON/OFF
Marche
Marche arrière
Importante:
• La instalación y el reemplazo de las pilas será realizado
únicamente por adultos.
• No se mezclarán diferentes tipos de pilas, ni pilas nuevas con usadas.
• Se utilizarán únicamente pilas del mismo tipo o equivalente al recomendado (1,5 V).
• Las pilas se colocarán con la polaridad correcta.
• Las pilas agotadas se retirarán del juguete.
• Los terminales de suministro no se cortocircuitarán.
• Siempre se retirarán las pilas si el juguete no se utiliza durante un período de tiempo.
• Se protegerá el juguete de la exposición al agua y a la humedad.
• No se intentarán recargar las pilas no recargables.
• Las pilas recargables se retirarán del juguete antes de recargarlas.
• Las pilas recargables se cargarán únicamente bajo la supervisión de un adulto.
• Las pilas usadas y los componentes eléctricos se desecharán en un punto de recogida aprobado.
• Los componentes eléctricos o las pilas no se desecharán junto con la basura doméstica.
Por favor, guarde este documento para consultas futuras.
Primeros pasos:Arranque la locomotora Smart Tech pulsando el botón
“ON” que permite su encendido. A continuación, en la parte superior de la
locomotora, pulse el botón “forward” (avance) o “back” (retroceso) para activar
las funciones electrónicas.
Cómo funciona Smart Tech:
• La locomotora Smart Tech actúa como el centro de todas las actividades "Smart” (inteligentes). La locomotora
envía y recibe señales de los elementos de interacción y juego, y las transfiere a modo de series de acciones
concretas, efectos acústicos y visuales.
• La locomotora Smart Tech se puede utilizar sin túneles o estaciones “Smart” mediante el uso de los botones en la
parte superior de la locomotora que permiten su control.
• La locomotora Smart Tech se apagará automáticamente después de 5 minutos de inactividad.
• Otras unidades con RFID (identificación por radiofrecuencia) pueden interferir con los productos Smart Tech. Por
ejemplo, evite colocar tarjetas de crédito cerca. De darse esta situación, retire la locomotora de la zona de
interferencias; apáguela en el botón “OFF” y vuelva a encenderla en el botón “ON” para que se reactive.
• Si las ruedas giran y parecen tener demasiada holgura en el agarre a las vías, asegúrese de que las vías y las ruedas
están libres de polvo. Límpielas con un paño húmedo.
• Si la locomotora Smart Tech descarrila, asegúrese de que las vías están sobre una superficie plana y
correctamente conectadas.
• La luz trasera del motor se iluminará de rojo cuando llegue el momento de cambiar las baterías.
• Nota: El motor debe operar en la dirección de marcha adelante al subir por una vía ascendente.
La locomotora Smart Tech junto con otros productos Smart Tech:
• Para un funcionamiento óptimo, asegúrese de que el túnel o la estación Smart Tech está en posición fija sobre
una superficie plana.
• Nota: algunos productos Smart Tech pueden ralentizar a la locomotora, de modo que evite colocar una vía
ascendente a continuación de un túnel o una estación Smart Tech.
• Si la locomotora Smart Tech no responde al túnel o a la estación Smart Tech, asegúrese de que se asienta sobre
una superficie plana. En caso contrario, intente cambiar las pilas.
Nota: Si el motor Smart Tech se congela en una posición o no reacciona correctamente, intente restablecerlo
pulsando cualquier botón del motor.
Sustitución de las pilas: La locomotora Smart Tech utiliza 2 baterías AA de 1,5 V. Con ayuda de un destornillador,
abra la tapa del compartimento de las pilas (véase la ilustración). Coloque las pilas como se muestra (+/-). Cierre la
tapa y apriete el tornillo. Arranque la locomotora Smart Tech pulsando el botón “ON”
que permite su encendido. Pulse uno de los botones en la parte
superior de la locomotora para activarla.
Parada
Una luz roja parpadeante
indica que se va marcha
atrás. Una luz roja ja
indica que el nivel de la
batería es bajo.
Luz frontal
ON/OFF
Conectar
Retroceso
Importante:
• As pilhas só podem ser colocadas ou substituídas por adultos.
• Não podem ser misturados vários tipos de pilhas ou pilhas novas e usadas.
• Só podem ser usadas pilhas recomendadas do mesmo tipo ou de um tipo
equivalente (1,5 V).
• As pilhas devem ser inseridas com a polaridade certa.
• As pilhas gastas devem ser removidas do brinquedo.
• Os terminais de alimentação não podem ser curto-circuitados.
• Retire sempre as pilhas se o brinquedo não for usado durante algum tempo.
• Proteja o brinquedo de água ou humidade.
• Não tente recarregar pilhas não recarregáveis..
• As pilhas recarregáveis devem ser retiradas do brinquedo antes de serem carregadas.
• As pilhas recarregáveis só podem ser carregadas com a supervisão de adultos.
• As pilhas usadas e os componentes elétricos devem ser descartados num ponto de recolha aprovado.
• Os componentes elétricos ou as pilhas não devem ser descartados juntamente com o lixo doméstico.
Guarde para consulta futura!
Para começar:
Ligue o comboio Smart Tech, movendo o interruptor para a posição
“ON” na parte de baixo do comboio. Em seguida, no topo do comboio,
prima “avançar” ou “recuar” para ativar as funções eletrónicas.
Como funciona o Smart Tech:
• O comboio Smart Tech funciona como o centro de todas as atividades “Smart”. O comboio envia e recebe sinais
de elementos de jogo e transfere-os numa série de ações, sons e efeitos de luz únicos.
• O comboio Smart Tech pode também ser comandado sem túneis nem estações “Smart”, através dos botões no
topo do comboio.
• O comboio Smart Tech desliga-se automaticamente após 5 minutos de inatividade.
• Outras unidades com RFID (identificação por radiofrequências) podem interferir com produtos Smart Tech.
Evite colocar, por exemplo, cartões de crédito nas proximidades. Caso isso aconteça, afaste o comboio da zona de
perturbação, coloque-o em “OFF” e novamente em “ON” para o reativar.
• Se as rodas girarem e parecer soltas nos carris, garanta que os carris e as rodas estão livres de poeira. Limpe com
um pano húmido.
• Se o comboio Smart Tech descarrilar, assegure-se de que os carris se encontram numa superfície plana e estão
corretamente conectados.
• A luz de fundo no motor acenderá a vermelho quando for necessário mudar as pilhas.
• Nota! A locomotiva precisa de ser movida para a frente numa pista em subida.
O comboio Smart Tech em conjunto com outros produtos Smart Tech:
• Para um funcionamento ideal, assegure-se de que o túnel ou estação Smart Tech se encontram imóveis numa
superfície plana.
• Nota! Alguns produtos Smart Tech podem abrandar o comboio, por isso evite colocar um carril ascendente logo
após um túnel ou estação Smart Tech.
• Se o comboio Smart Tech não responder ao túnel ou estação Smart Tech, assegure-se de que está assente
numa superfície plana. Caso contrário, tente substituir as pilhas
Observação! Se o motor Smart Tech paralizar em uma posição ou não reagir corretamente, tente restaurá-lo
ao premir qualquer botão no motor.
Substituir as pilhas: o comboio Smart Tech funciona com 2 pilhas AA de 1,5 V. Use uma chave de fendas para abrir
a tampa do compartimento das pilhas (ver a ilustração). Coloque as baterias conforme mostrado na figura (+/–).
Feche a tampa do compartimento das pilhas e aperte o parafuso. Ligue o comboio Smart Tech, movendo o
interruptor para a posição “ON” na parte de baixo do comboio. Prima um dos botões no topo do comboio para o
ativar.
Parar
A luz vermelha pisca na
condução para trás.
Uma luz vermelha
contínua indica pilha
fraca.
Luz dianteira
ON/OFF
Conectar
Marcha-atrás
Importante:
• Il montaggio e la sostituzione delle batterie va effettuato da un adulto.
• Non mischiare tipi diversi di batterie, o batterie nuove e usate.
• Usare solamente le batterie raccomandate, di tipo uguale o equivalente
a quello indicato (1,5 V).
• Inserire le batterie secondo la polarità indicata.
• Rimuovere le batterie scariche dal giocattolo.
• Non mettere in corto circuito i terminali.
• Rimuovere sempre le batterie se il giocattolo non viene usato per qualche tempo.
• Proteggere il giocattolo da acqua o umidità.
• Non tentare di ricaricare le batterie se non sono di tipo ricaricabile.
• Rimuovere le batterie ricaricabili dal giocattolo prima di ricaricarle.
• Le batterie ricaricabili vanno ricaricate sotto la supervisione di un adulto.
• Le batterie e i componenti elettrici usati vanno gettati negli appositi punti di raccolta.
• I componenti elettrici e le batterie non vanno gettati nei normali rifiuti urbani.
Conservare per riferimento futuro.
Per iniziare: Accendi la Locomotiva Smart Tech portando l'interruttore
che trovi sotto la locomotiva su ON. Premi i tasti "avanti" o "indietro" sulla
parte superiore della locomotiva per attivare le funzioni elettroniche.
Come funziona Smart Tech:
• La Locomotiva Smart Tech funziona come centro di tutte le attività "Smart". La Locomotiva invia e riceve segnali
dai diversi elementi di gioco e li traduce in una serie di azioni, suoni ed effetti luminosi unici.
• La Locomotiva Smart Tech può anche essere usata senza tunnel o stazioni "Smart", comandandola con i tasti
sopra la Locomotiva stessa.
• La Locomotiva Smart Tech si spegne automaticamente dopo 5 minuti di inattività.
• Altre unità con RFID (Identificazione a radiofrequenza) potrebbero interferire con i prodotti Smart Tech. Evita ad
esempio di posizionare carte di credito nelle vicinanze del prodotto. Se si verificassero interferenze, sposta la
Locomotiva lontano dalla fonte di interferenza, spegnila portando l'interruttore su "OFF" e poi riaccendila
portando l'interruttore su "ON".
• Se le ruote girano ma sembrano fare poca aderenza sui binari, assicurati che sia le ruote, sia i binari siano puliti e
privi di polvere. Puliscili con un panno umido.
• Se la Locomotiva Smart Tech deraglia, assicurati che i binari siano posti su una superficie piana e siano collegati
correttamente.
• La retroilluminazione del motore si illuminerà di colore rosso quando è ora di cambiare le batterie.
Nota! Quando si risale un binario in salita, la locomotiva deve essere azionata in avanti.
La Locomotiva Smart Tech assieme ad altri prodotti Smart Tech:
• Per un funzionamento ottimale, assicurati che il tunnel o la stazione Smart Tech poggino ben saldi su una
superficie piana.
• Nota! Alcuni prodotti Smart Tech potrebbero rallentare la locomotiva, quindi evita di montare un tratto in salita
subito dopo il tunnel o la stazione Smart Tech.
• Se la Locomotiva Smart Tech non risponde al tunnel o alla stazione Smart Tech, assicurati che questi si trovino
su una superficie piana. Altrimenti, prova a sostituire le batterie.
Attenzione! Se la locomotiva Smart Tech si blocca in una posizione o non reagisce correttamente, provare
a reimpostarla premendo un pulsante qualsiasi.
Sostituzione delle batterie: la Locomotiva Smart Tech è alimentata da due batterie AA da 1,5V. Per aprire il
coperchio del vano batterie, utilizza un cacciavite (vedi l'illustrazione). Inserisci le batterie come indicato (+/–).
Chiudi il coperchio del vano batterie e stringi la vite. Accendi la Locomotiva Smart Tech portando l'interruttore che
trovi sotto la locomotiva su ON. Premi uno dei tasti sopra la locomotiva per attivarla. no topo do comboio para o
ativar.
Stop
Una spia rossa
lampeggia quando si
procede in retromarcia.
Una spia rossa ssa
indica batteria scarica.
Luci anteriori
ON/OFF
AvantiIndietro
Dôležité:
• Batérie by mali inštalovať a vymieňať iba dospelé osoby.
• Rozličné typy batérií alebo nové a použité batérie sa nesmú používať spolu.
• Smú sa používať iba odporúčané batérie rovnakého alebo ekvivalentného typu,
tak ako je odporúčané (1,5 V).
• Batérie treba vložiť so správnou polaritou.
• Vybité batérie treba z hračky vybrať.
• Napájacie terminály sa nesmú skratovať.
• Ak sa hračka po dlhšiu dobu nemá používať, batérie vždy vyberte.
• Chráňte hračku pred vodou alebo vlhkosťou.
• Nepokúšajte sa nabíjať nenabíjateľné batérie.
• Nabíjateľné batérie sa pred nabíjaním musia vybrať z hračky.
• Nabíjateľné batérie sa musia nabíjať iba pod dohľadom dospelej osoby.
• Použité batérie a elektrické komponenty sa musia zlikvidovať na schválenom zbernom mieste.
• Elektrické komponenty alebo batérie sa nesmú vyhadzovať v domovom odpade.
Prosím, odložte si na účely použitia v budúcnosti!
Začatie hrania:
Zapnite lokomotívu Smart Tech prepnutím spínača na spodku
lokomotívy do polohy „ON“ (Zap.). Ďalej, na vrchu lokomotívy stlačte
tlačidlo „Dopredu“ alebo „Dozadu“ pre aktivovanie elektronických funkcií.
Ako funguje How Smart Tech:
• Lokomotíva Smart Tech funguje ako centrum všetkých „Smart“ aktivít. Lokomotíva vysiela a prijíma signály z
herných prvkov a premieňa ich na sériu jedinečných akcií, zvukových a svetelných efektov.
• Smart Tech možno používať taktiež bez „Smart“ tunelov alebo staníc pomocou tlačidiel na vrchu lokomotívy,
ktoré slúžia na jej ovládanie.
• Lokomotíva Smart Tech sa automaticky vypína po 5 minútach nečinnosti.
• Iné jednotky s RFID (Radio Frequency Identity) môžu interferovať s produktmi Smart Tech. Zabráňte tomu, aby
sa v blízkosti nachádzali napr. kreditné karty. Ak by k tomu došlo, odstráňte lokomotívu z blízkosti rušiaceho prvku
a vypnite ju a opätovne zapnite, aby sa znova aktivovala.
• Ak sa kolesá otáčajú a zdá sa, že majú príliš slabý záber na koľajniciach, zabezpečte, aby koľajnice a kolesá boli bez
prachu. Utrite ich vlhkou utierkou.
• Ak sa lokomotíva Smart Tech vykoľají, presvedčte sa, či sú koľajnice na rovnom povrchu a sú správne spojené.
• Keď nastane čas pre výmenu batérií, rozsvieti sa svetlo na zadnej časti lokomotívy.
Upozornenie! Pri jazde nahor po stúpajúcej trati musí lokomotíva jazdiť v smere dopredu.
Lokomotíva Smart Tech spolu s inými produktmi Smart Tech:
• Na účely zaistenia čo najlepšieho fungovania zabezpečte, aby tunel alebo stanica Smart Tech boli nehybne
umiestnené na rovnom povrchu.
• Upozornenie! Niektoré produkty Smart Tech dokážu spomaliť lokomotívu, takže zabráňte umiestneniu
stúpajúcich koľajníc hneď za tunelom alebo stanicou Smart Tech.
• Ak lokomotíva Smart Tech neodpovedá tunelu alebo stanici Smart Tech, presvedčte sa, či sa nachádza na
rovnom povrchu. V opačnom prípade vymeňte batérie.
Upozornenie! Ak lokomotíva Smart Tech „zamrzne“ v niektorej polohe alebo nereaguje správne, pokúste
sa o resetovanie stlačením ľubovoľného tlačidla na lokomotíve.
Výmena batérií: Lokomotíva Smart Tech je napájaná 2 x 1,5 V AA batériami. Použite skrutkovač na otvorenie krytu
batérie (pozri ilustráciu). Nainštalujte batérie tak, ako je znázornené (+/-). Zatvorte kryt batérie a pritiahnite skrutku.
Zapnite lokomotívu Smart Tech prepnutím spínača na spodku lokomotívy do polohy „ON“ (Zap.). Stlačte jedno z
tlačidiel na vrchu lokomotívy pre jej aktivovanie.
Stop
Červené svetlo bliká
pri cúvaní.
Stále červené svetlo
označuje prázdnu batériu.
Predné svetlá
ZAP./VYP.
DopreduDozadu
NOTE: This equipment has been tested and found to comply with the limits for a Class B digital device, pursuant to part 15 of the FCC Rules.
These limits are designed to provide reasonable protection against harmful interference in a residential installation.
This equipment generates, uses and can radiate radio frequency energy and, if not installed and used in accordance with the instructions,
may cause harmful interference to radio communications. However, there is no guarantee that interference will not occur in a particular installation.
If this equipment does cause harmful interference to radio or television reception, which can be determined by turning the equipment off and on, the user is encouraged to try to correct the interference by one or more of the following measures:
— Reorient or relocate the receiving antenna.
— Increase the separation between the equipment and receiver.
— Connect the equipment into an outlet on a circuit different from that to which the receiver is connected.
— Consult the dealer or an experienced radio/TV technician for help.
This device complies with part 15 of the FCC Rules. Operation is subject to the following two conditions: (1) This device
may not cause harmful interference, and (2) this device must accept any interference recieved, including interference
that may cause undesired operation.
Changes or midifications not expressly approved by the party responsible for compliance could void the user’s authority
to operate the equipment.
Frekvenčný rozsah: 13.553 až 13.567MHz. Maximálny
výstupný výkon RF výrobku: -16.13dBuA/m pri 10m.
Gamma di frequenza: da 13,553 a 13,567 MHz. Potenza di uscita
RF massima del prodotto: -16,13 dBuA/m a 10 m.
Gama de frequências: 13,553 a 13,567MHz. Potência de
saída RF máxima do produto: -16,13dBuA/m com 10m.
Rango de frecuencia: 13.553 a 13.567MHz. Potencia de
salida RF máxima del producto: -16,13 dBuA/m a 10 m.
Plage de fréquence : 13,553 à 13,567 MHz. Puissance de sortie
RF maximale du produit : -16,13 dBuA/m à 10 m.
Frequenzbereich: 13.553 bis 13.567MHz. Maximale HF-Ausgangsleistung
des Produkts: -16,13 dBuA/m bei 10 m.
Frequency range: 13.553 to 13.567MHz. Maximum
RF output power of the product: -16.13dBuA/m at 10m.


Bli med i samtalen om dette produktet
Her kan du dele hva du synes om BRIO 33834 Smart Engine with Action Tunnels. Hvis du har et spørsmål, les først bruksanvisningen nøye. Be om en bruksanvisning kan gjøres ved å bruke vårt kontaktskjema.